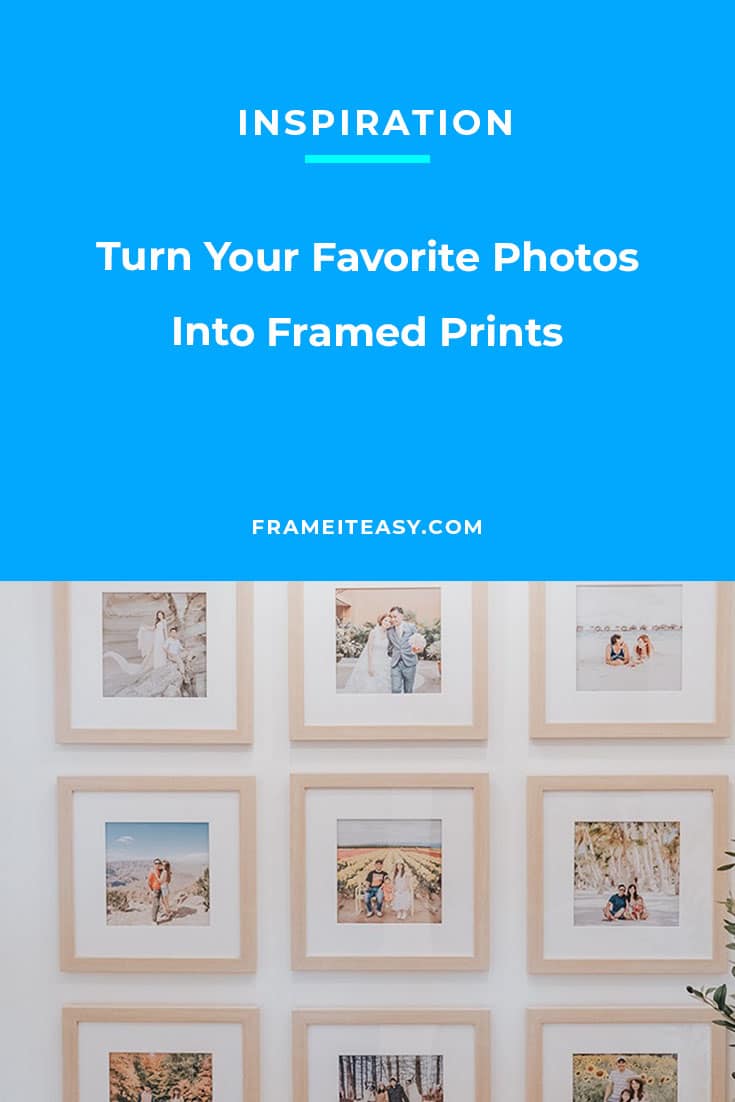
A picture frame is a timeless memory that creates a grand display for all of your favorite photos. With our interactive Frame Designer, we make it easy to turn your favorite photos into framed prints. You have two options, if you already own a physical copy of your photo, simply measure it to represent the “Art Size” on our Frame Designer and build a frame that will perfectly fit your photo. The other option is to upload your photo to the Frame Designer and choose a paper type, and we will print, mount, and frame your photo for you, so it will arrive at your doorstep ready to be hung!
If this is your first time to our Learning Center, welcome and we’re glad you found us! Here at Frame It Easy, our mission is simple — to make custom online framing simple, affordable, and fast, leaving you more time (and money) to experience those frameable moments. We stand by the fact that we are one of the most affordable online framing companies, with great quality frames.
So, if you are ready to turn your favorite photos into framed prints — let’s get started!
Find Your Favorite Photos to Frame

This may seem explanatory, but it might be a lot harder than you think, especially if you take a ton of photos! Scroll through your cellphone photos, take a look at school portraits, family photos from your favorite vacation, or maybe even some old photos of your grandparents from back in the day! The choice is completely up to you, and with our affordable frames, you’re not limited to what you can frame. Once you have found your perfect photo or photos, head to the next step so you can get your frames hanging on your walls faster!
Find The Setting For Your Framed Prints

If you’ve been to our Learning Center before, you know we always suggest choosing where you will be displaying your frames before actually designing them. This makes the next few steps a lot easier as you will be able to coordinate your frames with your other decor pieces. However, remember what we always say — the design process is completely up to you! That’s the best part about custom framing, we customize our frames to your needs, so you don’t have to change your art to fit our frames! Finding your location though can guide you in choosing the style, color, and size you will need for your frames.
If you are decorating your bedroom, take your bed frame, dresser, or your vanity into consideration. For example, if you have a light wash bedroom set and accessories consider our Dayton Frame in the color Sand. For your living room take a look at your couch, coffee table, or other decor pieces like a piano or clock on the wall. If you have dark wood-wash furniture, try our Derby frame in the color Cherry.
How To Design Your Frames
Your final step is going to be to design your frame. Our Frame Designer has four easy steps:
Step 1: Enter your art size.
If you are uploading your portrait, we will print, mount, and frame your photo so that your frame will arrive ready to be hung. If you are uploading your art to our site, you will also need to choose the type of paper you would like us to print on. As we mentioned, we offer Photo Paper, Art Paper, and Giclée Paper. If you already have a physical copy of your portrait, simply measure the photo and add in the Art Size on our site.
Step 2: Choose your frame style.
We have 13 frame styles, 6 metal frames, and 7 wood frames with over 20 frame colors.
Step 3: To mat or not to mat?
A matboard (also referred to as a photo mat, frame mat, or matting), is a cardboard-like material that serves two purposes: to protect your artwork from damage and to enhance the look of it. You have the option to add a single or double matboard, or none at all. We suggest if you are adding a matboard to add a color that is going to enhance your picture. Look for small colorful details in your photo, such as an accessory, an article of clothing, or even something in the background of your photo that will give your portrait that extra POP it was looking for!
Step 4: Finally, your cover!
Last but certainly not least is choosing your cover. We have three options for covers, our clear acrylic which is most conventional and almost like looking through glass. If your art is colorful, clear would be the best option, as it would not soften any of the colors in your photo or artwork. However, the clear finish is reflective, and it could cause glare if placed near a window, where the sun would shine through. Another option is our non-glare acrylic. This will soften the color of your artwork, so we recommend using it if your overall piece doesn’t have bright colors, or is entirely in black and white. Non-glare acrylic will also diffuse sunlight that hits it, which would make your artwork more viewable if it’s near a window. Lastly, we offer Conservation Clear which
provides superior clarity with 99% UV protection, preserving your art without color distortion. It is extra durable and rigid at 3mm thick. Perfect for artists, museums, galleries, larger works, and anything that you want to preserve long-term.
Final Thoughts

Turning your favorite photos into framed prints to display on your walls has never been easier! We hope we inspired you to create something beautiful for your walls or even for a tabletop display!
As always, if you need any assistance creating your framed photo, reach out to us! There is always someone around to help. Don’t forget to share your final product with us on social media, we can’t wait to see what you design.