How to Measure Art for a Perfect Frame Fit
Sizing got you stressed?
No need to worry - we got you!
Our made to measure picture frames are custom built to accommodate any size you desire. Measuring your art correctly is arguably the most crucial part of framing, but have no fear - it’s easy!
Here’s how to make sure you get the perfect fit:
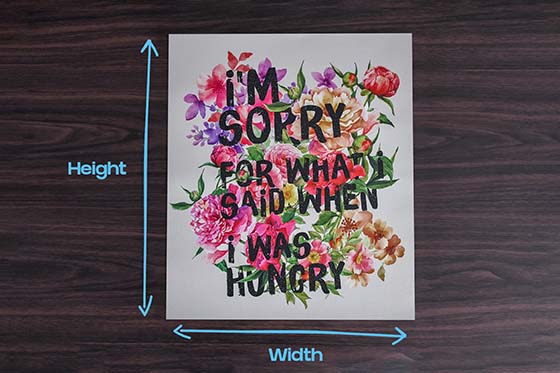
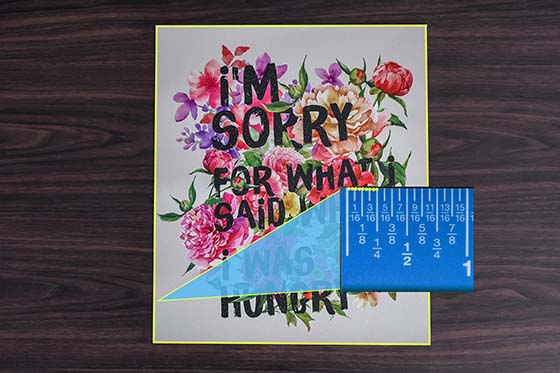
- Use a ruler or measuring tape that uses inches - the more rigid, the better, to ensure the most accurate edge to edge reading. For the most accurate measuring, we recommend only using rulers & rigid tape measurers that have 15 incremental lines in between each of the whole numbers.
- Making sure you start from the “0” point, line it up to the left side edge of your art going all the way to the right edge. Note the most precise measurement. (This is your “width”.)
- Now line up your 0 point to the bottom edge, and go all the way to the top edge, noting the most precise measurement. (This is your “height”.)
How to Measure Art With a Border
If you have a piece of art that has a border around it, you first have to decide if you want that border visible or not.
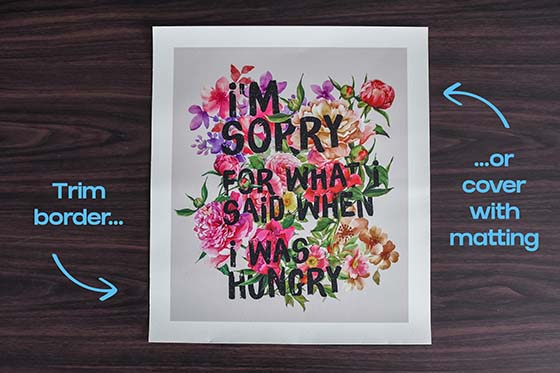
- If you do want it visible once your art is in the frame, simply measure your art from left to right and top to bottom, including the border.
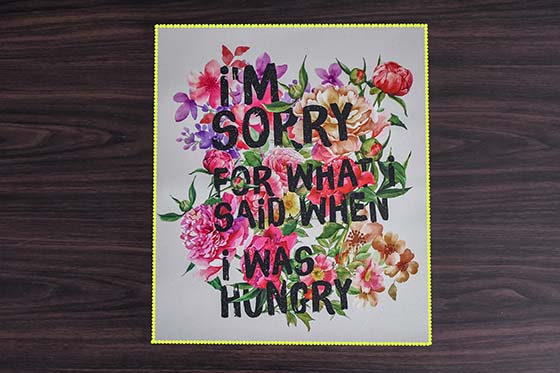
- If you do not want the border visible and it is more than ¼”, you will either need to trim the border off, or add matting to cover it. If you decide to trim your art, simply measure it once the border has been trimmed off. If you prefer to cover it with matting, measure your art without the border included, then add matting to your frame in a thickness larger than the border itself. (So for example if your border on one edge measures 1”, add at least 1” of matting to your frame.)
NOTE: If you'd like to cover the border with matting but do not want the 1/4" overlap on your artwork, measure just the artwork (sans border) and add 1/2" to both the Width & Height measurements.
How to Read A Ruler
Need some help reading the finer measurements on your ruler? Don’t sweat it - we’ve got some tips!
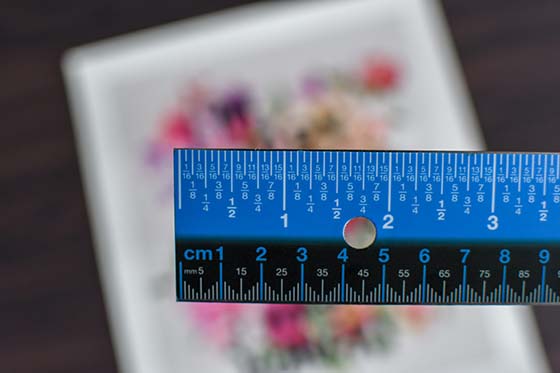
- First, make sure you’re measuring in inches (not centimeters) with a rigid ruler that has 15 incremental markers between each inch.
- For every inch, the 15 smaller markers in between signify 1/16” increments. (Though some rulers or measuring tapes may have more or less, we recommend only using measuring devices with 15 incremental lines for the most accurate sizing.)
- For rulers that measure in 1/16th increments, the longest halfway mark will be the half inch mark, half of that will be a quarter inch mark, half of that will be an eighth inch mark, and half of that will be a sixteenth inch mark.
- Most rulers and measuring tapes indicate these 1/16" increments with varying line heights. The longer the line, the larger the increment.
- When measuring your art, you’ll want to measure as close as possible to one of these incremental lines to get that perfect fit!
Become A Measuring Master
Key Frame-Related Measurements (& What They Mean)
Art Size
- The size of your art itself, before it gets added to a frame. (We build your frame around this, so your outer frame size will always be larger than your art size.)
Pro Tip: Even if your artwork or the artist claims it to be a certain size, you should always measure it yourself to confirm!
Outer Frame Size
- The total size of your frame (including any matting, the thickness of the frame style, etc.); how much space it will take up on your wall.
- The more matting you add, the larger your outer frame size will be.
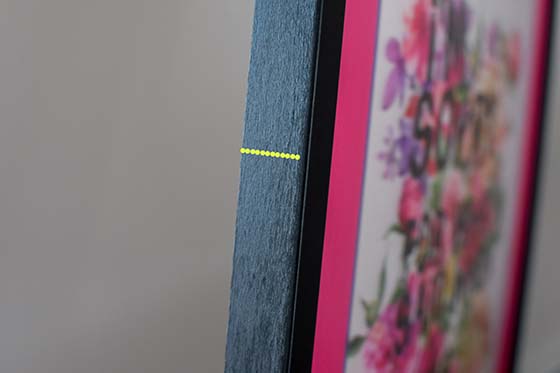
¼” Overlap
- To keep your art from falling through the frame opening, we automatically add a ¼” overlap to the art size you input. This means your art will be covered by ¼” on each side, which is usually only noteworthy if you have important details near the edge of your art.
- If you prefer less of an overlap (or no overlap at all), learn more here.
Frame Thickness
- The size of the visible surface on the face of the frame; how thick (or thin) each side will appear when you look at it straight on.
Frame Depth
- The size of the frame from front to back; how deep your frame is; how far it comes off the wall.
