There’s an expression in the carpentry world: measure twice, cut once. Simply put, a little planning and preparation save you both time and material. The same applies to your custom framing project with Frame It Easy. We think if you put a few things into place before you order your frame you will be much happier with your finished product.
So, maybe you’ve received a new art piece in the mail, you’re looking to update your current frames or you finally finished that puzzle you’ve been working on and now want to display it! And if it’s none of the above, you can always find inspiration in many of our posts. Whatever you want to frame, we’re here to help you get started in the right direction.
Determine What You Want To Frame

So, if you’ve already taken that first step of preparation and you know exactly what you want to frame, you can skip down to the next section. But if you’re undecided, you can just take a look around your house. Are your kids’ arts and crafts projects cluttering your home these days? Maybe you still love the poster you have hanging over your bed, but the frame it’s in just looks a bit dated. Or now that you’re spending more time in your home office you’d like to frame some of the old photos you’ve been going through to put on your desk.
If you don’t already have your frame-able art, there are tons of places online to find the perfect artwork for your space. Unsplash is a great place to find free downloadable art. Photographers from around the world share their beautiful artwork with you on this easy site to navigate. And there are tons of other places to find art online. Lucky for you, we’ve made a list of some of our favorites. If you’re in search of new art pieces or even just some inspiration, check out our top places to find art online.
For more ideas of things you may already have at home, check out our ideas for personalized picture frames.
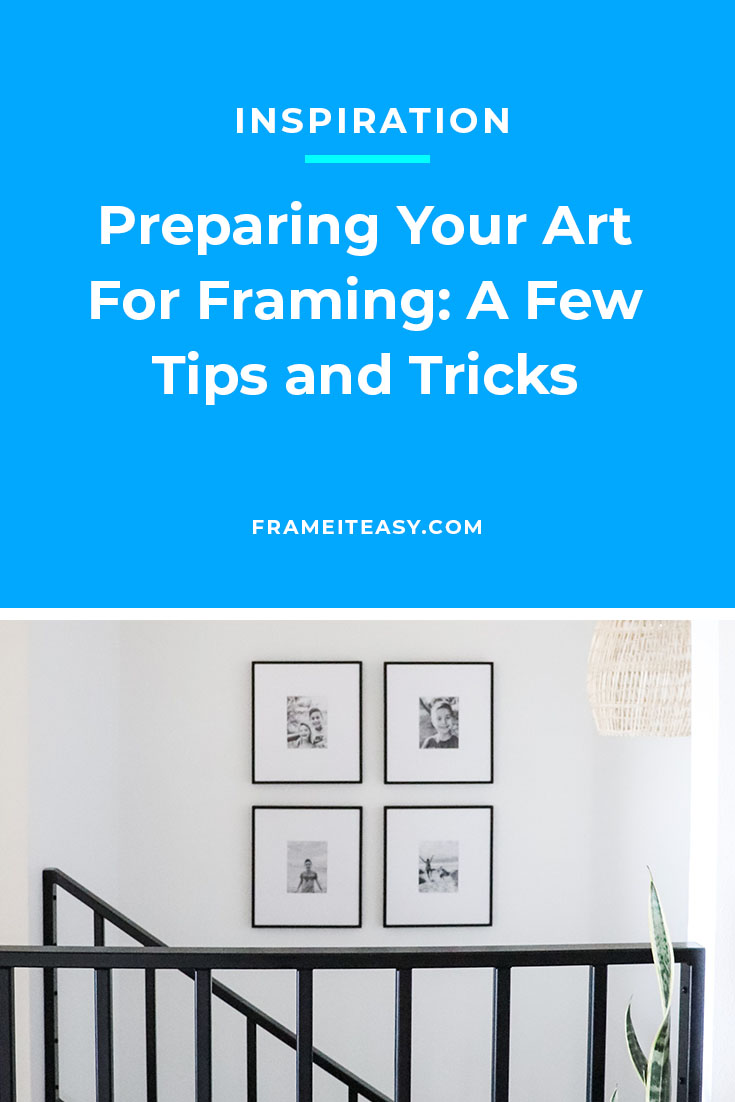
Contemplate Your Size & Space

If you’ve ordered frames with us before, then you know the deal. If you have the piece you want to frame, you first need to measure the art, which will represent your “Art Size” in our frame designer (unless you add matting, but we’ll get more into that later). For those of you that haven’t ordered with us before, or might have forgotten, keep in mind that there will be a 1/4″ overlap on all four sides of your art piece. We cut your frame and matboards around the “Art Size” that you entered, meaning that we subtract 1/2″ from the “Width” and “Height” that you punch in.
If you would like to learn more about Frame It Easy and what you can expect when buying from us for the first time, please check out our first time order guide for more help!
Next, think about where your new frame is going. Will you be replacing existing frames? If that’s the case and you are happy with the size then use that as your guide. However, if your existing piece takes up too little or too much space, now is the time to fix it. Likewise, if you are adding a new piece of art to your space, consider the size of that space in planning your frame preferences. Here is where adding matting (or not) comes into play. Obviously, if your space is tight, no matting is necessary; however, if you have ample room adding matting will put your artwork into scale and not get lost in your decor.
Assess Lighting And Other Issues

The physical location of your art and the environment surrounding it is another aspect you should give thought to. Natural light can not only cause glare from your artwork but may even damage it. Our non-glare cover diffuses light with a matted finish (softens colors slightly) and protects your art from some UV light. Although our clear cover will also protect your art from some UV light, it will not diffuse the light from your piece.
Sunlight is not the only issue you need to be concerned about when it comes to hanging your frames. There are some “risky” areas that you might need to take extra precautions with, such as bathrooms and above fireplaces. No matter how well-ventilated, steam, humidity, and heat can potentially ruin your artwork. We suggest not hanging any irreplaceable items in these places, but instead opt for something budget-friendly and replaceable if necessary. To learn more about the precautions you can take when hanging items in these areas, check out our post on hanging frames in “risky” areas.
Reflect On Your Design Goals

The best part of designing your own frame is that you get to make all the choices. Are you aiming for a classic, traditional look? Or is your goal to let your eclectic personality shine through your artwork choices? Whatever you choose, we’ve got you covered. If you upload your art to our interactive site, you can experiment with the numerous options we have. A simple wooden frame or an ornate one is available in several colors. Rounded or flat metal frames with a variety of color choices are also options.
Speaking of color, have fun and try out different mat colors with your art. Matting not only separates your art from the frame, but adds a decorative touch to it. Use your imagination here. Pick up a color in the art itself, or use your decor to tie in to your piece. Envisioning how your art will be incorporated into its new home will help you make decisions throughout the process.
No Surprises… Know What To Expect

Don’t worry about planning what to do after your frame arrives. If you uploaded your art to our site and we are printing it for you, when you receive your frame you will find it ready to hang with all the necessary hanging equipment included (except the hammer!) Your frame will have a protective film over it; simply remove that and you’re ready to display your custom framed piece.
If you measured your art at home, your framing will require a few extra steps. First, you’re going to want to remove the film from both sides of the acrylic, then place your art between the backing and the acrylic, slide the framing back into the rails and screw it back in place. Once this is done, you can easily assemble your hanging hardware, including your backing springs, mounting brackets, hanging wire, and bumpers to protect your wall! Then you are set to hang.
For more in-depth instructions, check out our metal frame assembly instructions and our wood assembly instructions.
Final Thoughts

Here at Frame It Easy, we make it simple for you to design, order, and display your artwork. And if you take the advice of carpenters, a little planning will ensure your final product will live up to your expectations. With very little prep work and easy ordering, your wall decor dreams will turn into reality in no time!