Looking for a creative way to preserve a special bouquet or bring a little nature indoors? Learning how to frame pressed flowers is a fun and simple DIY craft framing project that adds charm to any space. Whether you’re framing a sentimental bloom from your wedding day or just want to get crafty with wildflowers from your backyard, pressed flower art is a timeless decor idea. In this guide, we’ll walk you through the steps to create your own framed floral masterpiece, no previous experience required!
5 Easy Steps for Framing Pressed Flowers
Step 1: Mark Your Space
Step 2: Place Your Flowers
Step 3: Glue Your Flowers
Step 4: Prep Your Frame
Step 5: Reassemble Your Frame
Of course, there’s a little more to it than that, so let’s break down each step one by one.

Materials Needed For Framing Pressed Flowers
- dried flowers
- tweezers
- acid free-glue
- toothpicks
- tin foil
- matting with no cutout out
- matting with cutout
- foam core backing board
- pencil
- conservation acrylic cover
- hanging hardware
- microfiber cloth
- frame
If you know us, you dang well know framing materials matter. So we are opting for acid-free adhesive and conservation clear acrylic.
Before The DIY Framing Fun
Let’s set the stage for a smooth (and fun!) framing experience.
First things first: prep your workspace. Choose a clean, flat surface and lay down something soft—like a towel or cloth—to protect your frame and materials from scratches or scuffs.
Pick your flowers. You can absolutely press your own flowers at home for a personal touch—or, if you’re short on time (or patience), you can buy pre-pressed flowers online or at craft stores. According to Crissy, there are four ways to press flowers! Either way works beautifully, so go with whatever fits your DIY vibe!

Pick your frame and matting. Choose a frame that complements the style and shape of your pressed flower arrangement. Think about the overall vibe you want. Maybe choose a metal picture frame for a clean and modern look, rustic frames add a touch of warmth. We want a touch of vintage charm, so an oval mat cut was chosen. This detail can add a timeless feel and help your flowers take center stage.
Your Frame It Easy order may look like this:
- Frame Style: Derby, in Black | Art Size: 8″ x 10″ | Outside Frame Size: 10 1⁄16″ x 12 1⁄16″
- Cove Type: Conservation Clear Acrylic
- 1st Matboard in Smooth White (no opening) | Outside Dimensions: 8″ x 10″
- 2nd Matboard in Jet Black 8-ply with oval opening | Outside Dimensions: 8″ x 10 | Inside Dimensions: 6″ x 8″

Step 1: Mark Your Space
Before placing your flowers, lay your matting, with an opening, over the matting with no opening, and lightly trace the inside of the oval with a pencil. This gives you a clear guide for where your flowers should go, so they’re perfectly centered and don’t get hidden or placed where they shouldn’t. This small step makes a big difference in your final display!


Step 2: Place Your Flowers
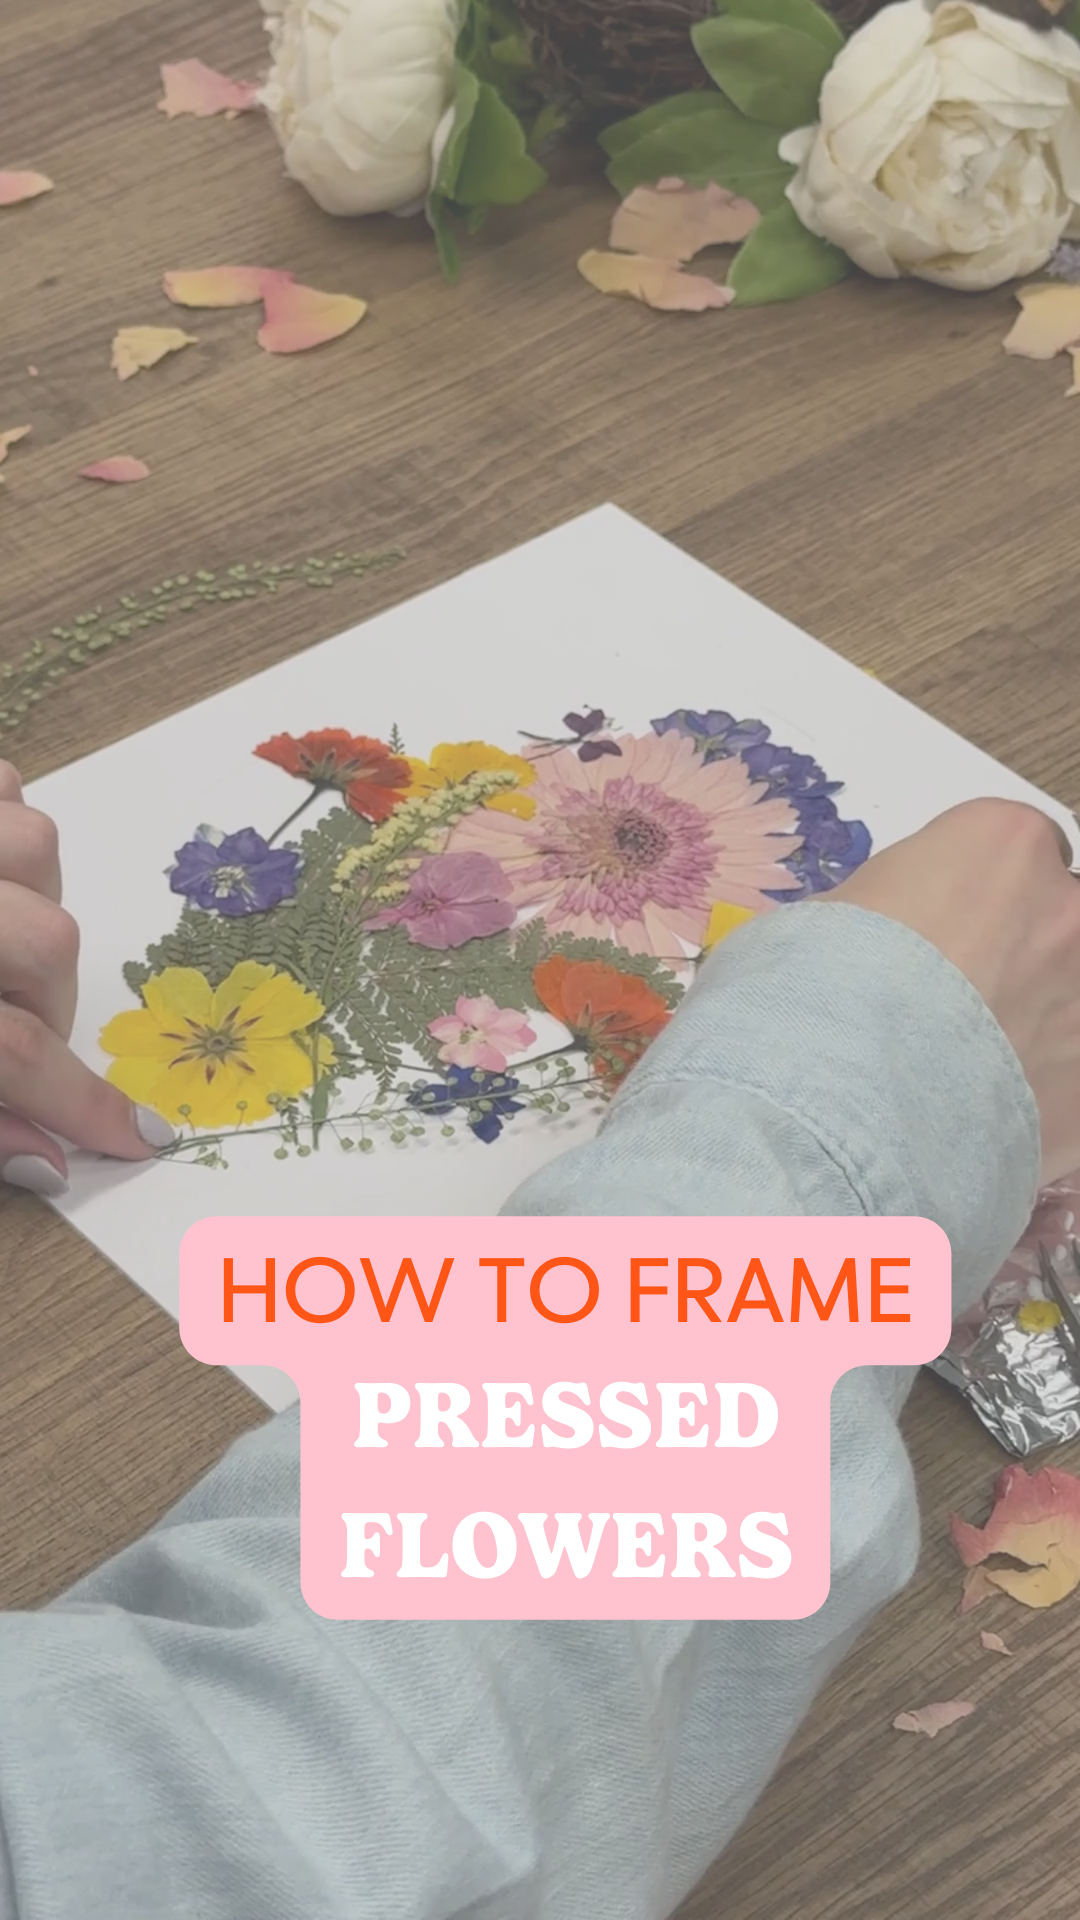
This is the fun part! Well, they’re all fun. But now that your flowers are pressed (or purchased!) and ready, it’s time to play around with your unique layout. Use the matting that your flowers will be glued to, and stay within the lines. In our case, it is the white matting, no cutout. Arrange them on your mat board in a way that feels balanced and beautiful, think of it like flower arranging…just flatter! Maybe you will go for a minimalist look with just a spring or two, or do a full floral on floral collage as we did. Take your time to experiment before committing. There’s no right or wrong—just what feels right to you!

Step 3: Glue Down Your Flowers
Time to make it official! Carefully glue each flower in place using a dab of acid-free glue. Acid-free glue will help protect your delicate petals from yellowing or damage over time. A little goes a long way, so use a light hand and press gently. Once everything is secure, let it dry completely before moving to the next step.
Pro Tip: We suggest letting everything dry overnight to make sure no adhesive adheres to your acrylic cover. Once the glue has dried, start assembling your display.
For a vintage-inspired framing, shop our Ornate Picture Frames.


Step 4: Prep Your Frame
Let’s get that beautiful custom frame ready! Gently open the back of your frame and remove the foamcore and acrylic. After peeling the film off, make sure the acrylic is dust and dander free…and no smudges either! Prepping your acrylic ahead of time will keep your pressed flowers looking picture-perfect. Set the backing aside for now… we’re almost there!

Step 5: Reassemble Your Frame
Let’s pull this all together now! Carefully place your pressed flower arrangement and matting back into the frame, making sure everything is lined up just the way you like it. Add the foamcore as the last layer. Secure the backing by folding the flexi-tabs, give it a quick check for dust or smudges, and voilà, your flowers are ready to forever bloom on your wall or shelf.

Reveal + Display + Enjoy!
Look at that beauty! Framing your pressed flowers is such a simple, creative way to preserve something beautiful, and frames make the perfect finishing touch. Whether you’re showcasing wedding blooms, a backyard find, or just getting crafty, a frame turns your DIY into a keepsake. With a custom frame, even the simplest moments can feel like art.


The Frame It Easy EaselMate
Add an EaselMate to your smaller frame sizes for a unique way to decorate your shelf or put your frame on a tabletop display!


Idea Alert! Frame Your Wedding Day Bouquet
Preserve some magic of your big day by framing the pressed flowers from your wedding bouquet. Whether it’s a single bloom or a full arrangement, turning your bouquet into wall art is a beautiful way to keep framing special wedding memories blooming for years to come. It’s more than decor—it’s a daily reminder of love, joy, and new beginnings.


No “real” flowers? No problem!
Browse our collection of floral art prints in our Art Marketplace! No pressing required. You can print and frame your favorite botanicals directly with us for an easy, beautiful display that’s always in season.
Ready to frame your own floral masterpiece? Start your DIY journey with a custom frame that fits your style perfectly!