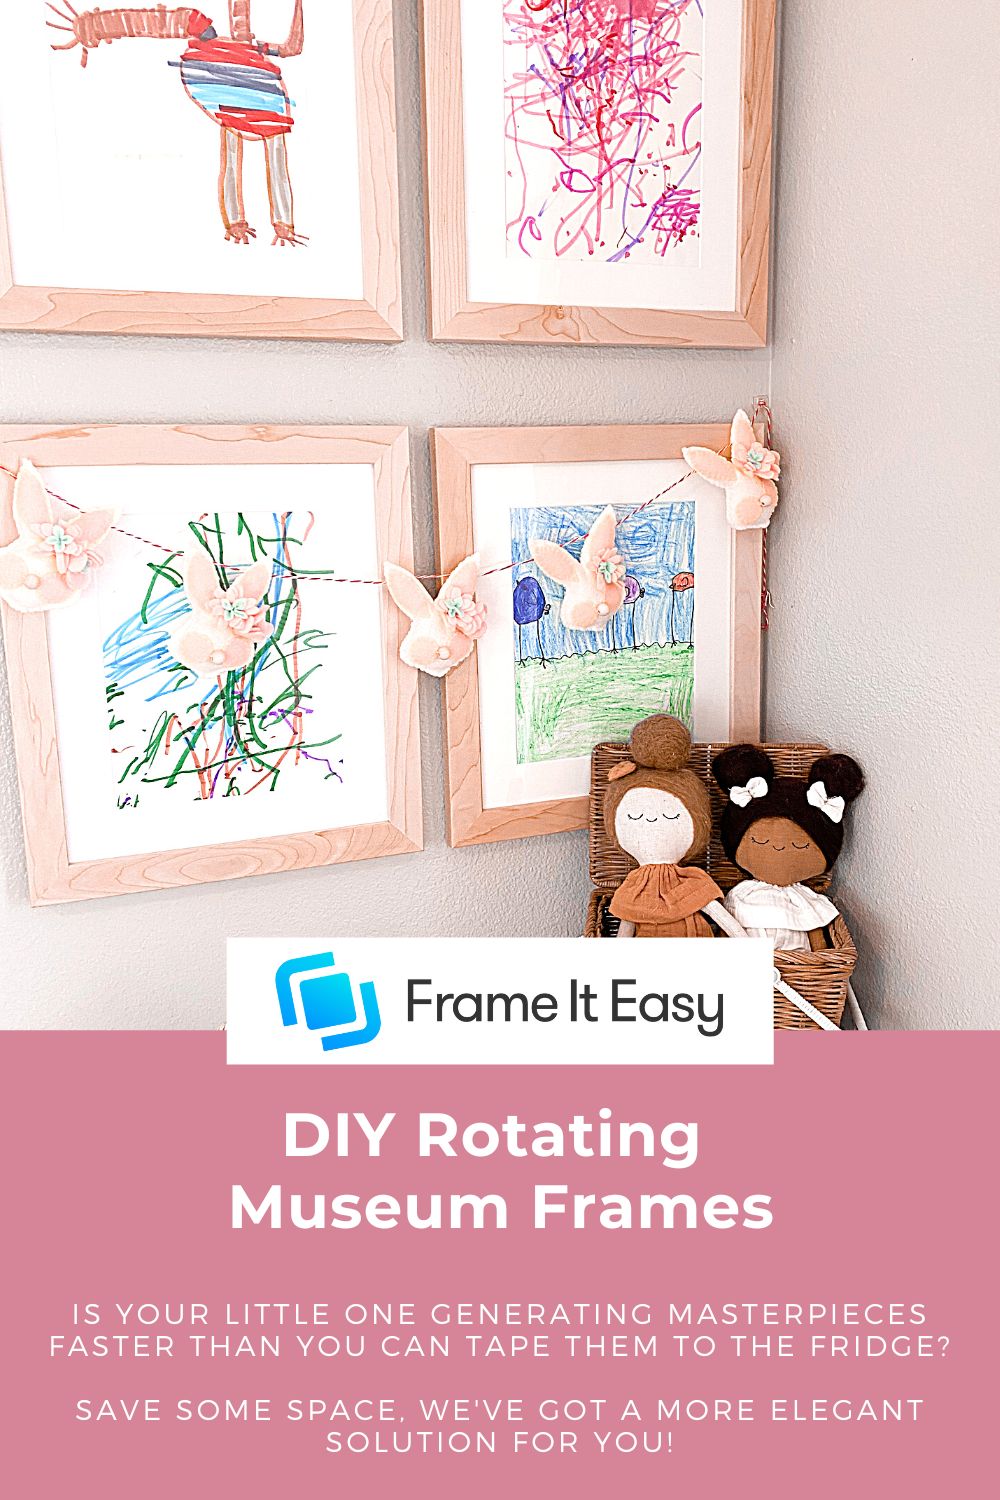
Is your little one generating masterpieces faster than you can tape them to the fridge Wondering how to display kids’ art? Save some space, we’ve got a more elegant solution for you!
So your little one’s channeling their inner Picasso, and getting a bit too slap-happy with the family fridge exhibition space. A young artist’s early period is full of trial and error as well as experimentation. (Just wait till their “Blue Period” – That’s “art snob” for teenage years.)
Until then, you’ve got tons of works with limited space, and of course, you want to display the young master’s latest and greatest! With this simple DIY kid’s artwork display idea, we’ll show you how to show off your kid’s art as the masterpieces they truly are!


You Will Need:
- Hot glue gun or craft glue
- Backing (1/2″ to 1″ bigger than your frame)
- 3 wooden square dowels (chopsticks work too!)
- Screwdriver
- Pliers (for pulling back flexitabs)
- Paint (optional)
- Fabric (optional)
- Sawtooth hanger (optional)
- Matting of choice (optional)
- Craft knife or scissors
- Frame It Easy Frame (hey, that’s us!)

Let’s Get Started!
Follow along with our video or view our step-by-step written directions below!
- First off, you’ll need to disassemble and take the backing off of your frame. For wooden frames, push back the flexipoint tabs and remove the contents of your frame (use pliers if needed). For metal frames, take your screwdriver and loosen the two parallel corner brackets, this will allow you to remove the frame rail along with the acrylic cover, matting, and backing of your frame.

- Next, make sure the protective film covering has been removed on both sides of your acrylic cover and place it back into your frame. Optional: Glue the acrylic cover to the inside of the frame.

- After your cover is placed be sure to remove the two bottom felt bumpers (on wooden frames) or the two bottom rubber bumpers (on metal frames).

- You’re almost there, to give the frame some depth (and the added bonus of being able to display 3D macaroni art), take the three wooden dowels and glue them on the back sides of your frame. Remove the installed hanging wire hardware as well. Feel free to paint the dowels to match your frame – for that extra polished look!

- Lastly, take your backing and measure to fit the size of your new frame (cut with craft scissors if needed). Then glue directly onto the three wooden dowels and install your hanging hardware as needed! You can also cover your backing in fabric or craft paper for a nice background when showcasing smaller masterpieces.

- After completely drying, your new museum frames are ready to hang! Give your little artist their very own mini-museum with an art accent wall, or turn the living room into a creative viewing space for guests and family. The best part is the artwork can be rotated out as fast as your artist can produce new masterworks!


Opening Night!
The red carpet is rolled out, guests have arrived, the artwork display frame is hung perfectly, and the apple juice is flowing! You’ve outdone yourself, now it’s time to go enjoy the exhibit! Maybe you’ll even get to meet the artist… 😉

Get Crafty!
Ready to start designing your own custom frame and jump on this “how to display kids’ art” project? Head to our Frame Designer to get started and don’t forget to check out our other Learning Center content for more kids bedroom ideas.
Be sure to share your kids’ art frames (including your child’s incredible art, of course!) with us on our socials! If you need any help selecting the perfect frame or have any questions, reach out to our support team who are always down to lend a helping hand.