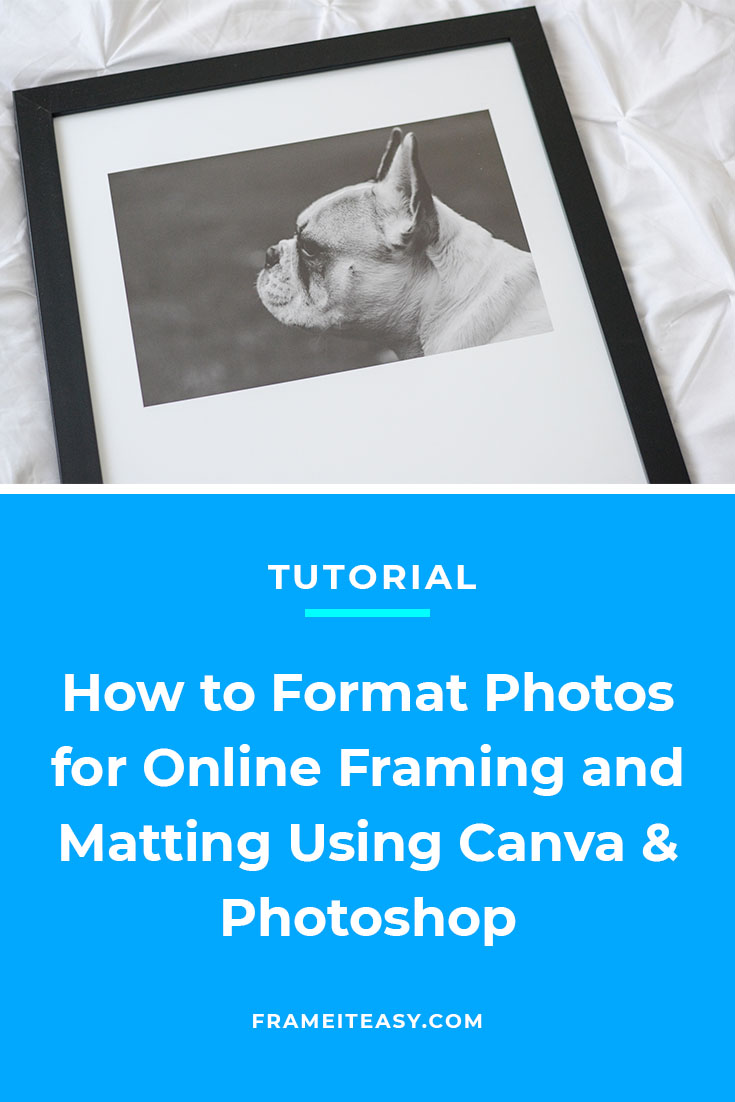
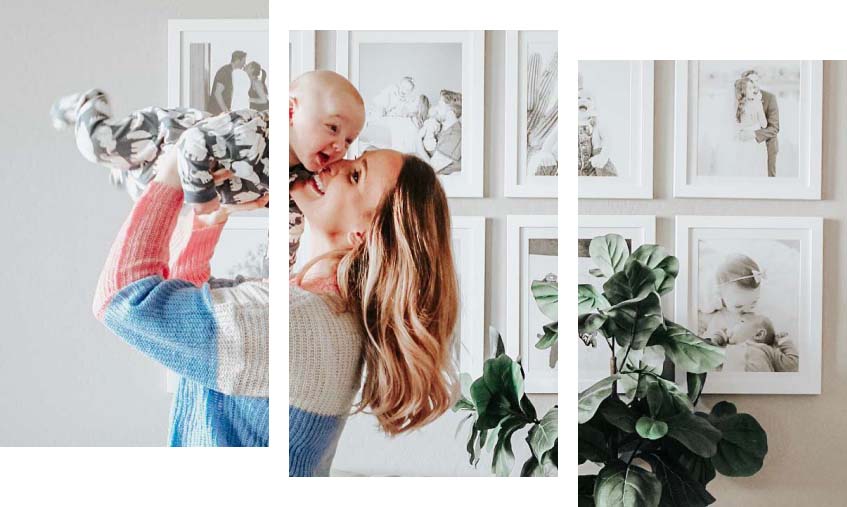
With all the technology available to us today, printing photos for online framing and matting has never been easier.
In most cases, you can simply upload a photo from your phone or computer to a print and frame service, choose some options, and you’re good to go.
But if you’re looking to do something a bit more unique — like maybe some offset / digital matting or a photo collage — you might need to work some image magic before uploading your file.
Don’t worry though — whether you have some technical know-how or are a complete novice, we’re breaking down how to easily format your digital imagery for online framing & matting.
What’s the Deal with DPI (Dots Per Inch)?
Before we get into formatting, we first have to chat about DPI. When it comes to any digital photo or image — formatted, edited, or straight out of a camera — DPI is a unit of measurement you often hear tossed around. But what is it, and what do you need to know about it when looking to print & frame a photo?
Dots per inch (or “DPI” for short) refers to the number of dots a printer puts down in a one-inch line. The greater this number, the more detail we can see in a printed photo.
When you take a photo, your camera saves it at a certain level of detail (which depends on the quality of the camera itself). These days camera technologies are so advanced that cameras and most smartphones take a high enough resolution image you shouldn’t have many problems, but it’s still important to know what role DPI plays in the quality of your print, especially if you plan to make alterations to it.
While the size of an image — how many pixels it is both in width and height — might seem like your best indicator, when it comes time to upload your file for printing, the DPI will be the biggest factor in how big you can print your photo.
For example, a photo taken with an iPhone X might be 3024 pixels wide by 4032 pixels tall. At 100 DPI the photo could be printed around 30″ x 40″ — but this would be less clear and sharp.

The same size photo (3024 x 4032 pixels), however, at 300 DPI, could be printed around 10″ x 13″ — a smaller print size, but higher quality and clarity.

That being said, while 300+ DPI is going to ensure your photo will be crisp and clear from any angle, you can sometimes get away with a lower DPI depending on the size and distance of your framed art.
The chart below is a handy reference for determining which DPI might work for your needs and standards:
General DPI Guidelines
| Dots Per Inch | Looks best from… | Looks good from… |
|---|---|---|
| 300+ | All distances | All distances |
| 200 | 2+ feet away | 1 foot away |
| 150 | 3+ feet away | 1 1/2 feet away |
| 100 | 4+ feet away | 2 feet away |
Note: It is not possible to add detail to a photo after it is taken – for example, there is nothing that can be done to a photo taken by an older cell phone camera to make it look like a picture taken by professional photography equipment. Since DPI is the amount of visual information in an image, once you’ve captured the photo, you can’t artificially add more.

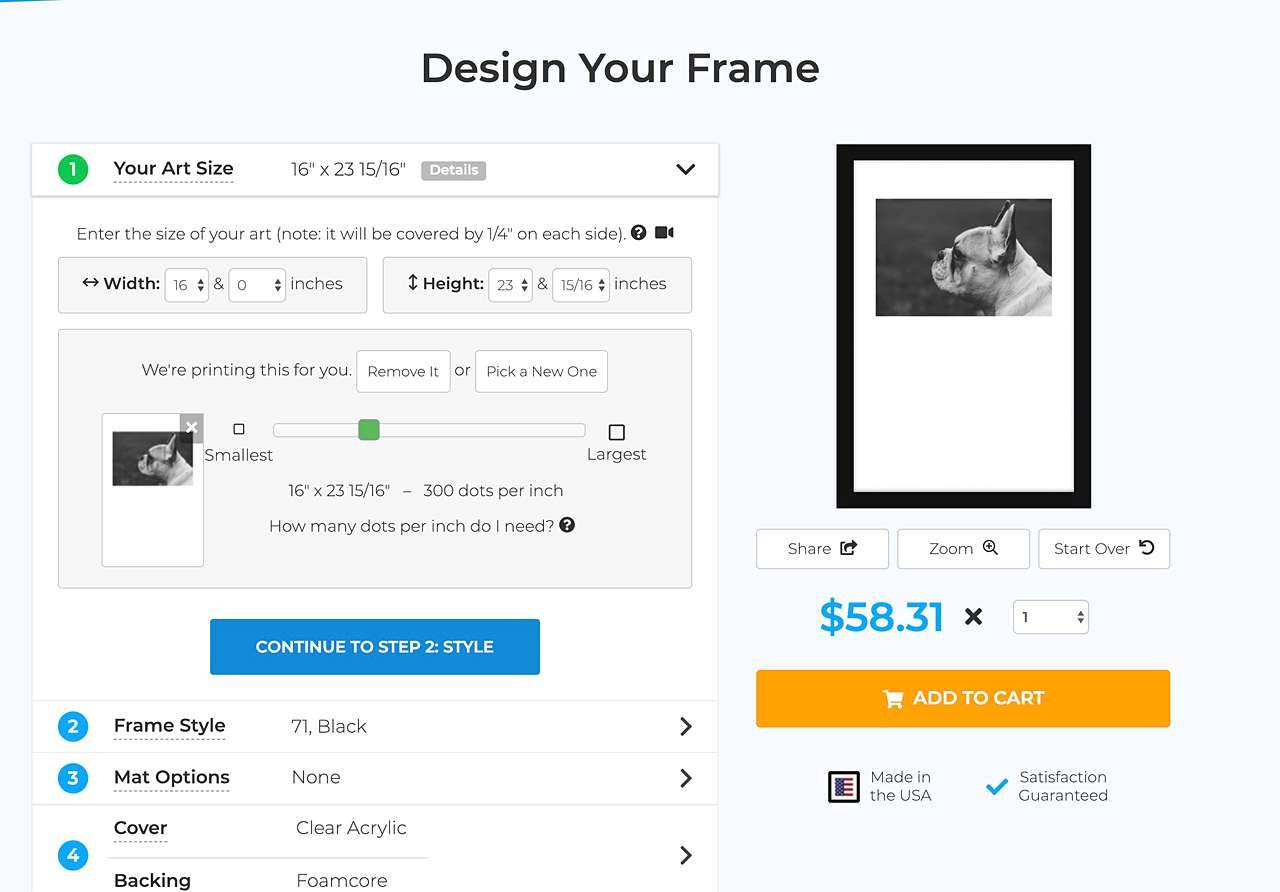
Here at Frame It Easy, we take the guesswork out of figuring out what size and DPI your uploaded photo is. Once you upload a file (.jpeg or .png), we have a handy slider that will show you the size we can print it at in relation to DPI.
What If You Found Your Photo Online?
Copyright and intellectual property concerns aside, usually photos found online are not nearly as detailed as photos that are intended to be printed on paper. That’s because most screens cannot display more than 72 dots per inch, the standard web resolution.
However, when you print a photo out and hold it at arm’s length, your eyes can discern up to 300 dots per inch, which is why 300 DPI is the best quality for any printed media.
For a myriad of reasons, though, it’s best to steer clear of using imagery found through an online search — instead look for high quality prints you can either purchase or are available for download with explicit usage rights.
Formatting Digital Photos
For any photo you want to have printed and framed, you’ll want to keep the following in mind:
- Make sure you start with the highest resolution photo/image you can.
- Remember that certain apps and websites (including social media sites) often compress images, so if you save from there your resolution might be much lower than recommended.
- Don’t forget there will be a ¼” overlap with any final framed piece.
If you have a high-quality photo on your phone or desktop that you want printed & framed as-is, all you need to do is upload it and choose an appropriate size. Easy peasy.
If, however, you want to make any sort of edits or alterations to the image, you’re going to have to work with the image in another program before uploading it to your printer/framer of choice.
For editing your photos to deal with issues of lighting, red-eye, or artistic filters, there are a myriad of programs and apps you can use depending on what features you’re looking for. The biggest thing to keep in mind here is you want to make sure you can export your edited photos at a high resolution, as discussed above.
When it comes to formatting your photos for placement or grouping, the two apps we recommend are either Canva or Photoshop.
Canva is a free web app that’s best if you’re a beginner or hobbyist looking for the easiest photo formatting option. While there are more limitations to size and export options here, the trade-off is that it’s quick, straight-forward, and free.
Photoshop is great if you already have some design/technical know-how when it comes to photo manipulation, and are willing to invest in the ability to control exact sizing, color profiles, and export features without limitation. The possibilities are truly endless here, giving you a lot more creative freedom albeit a steeper learning curve.
How to Format Offset “Digital Matting” in Canva
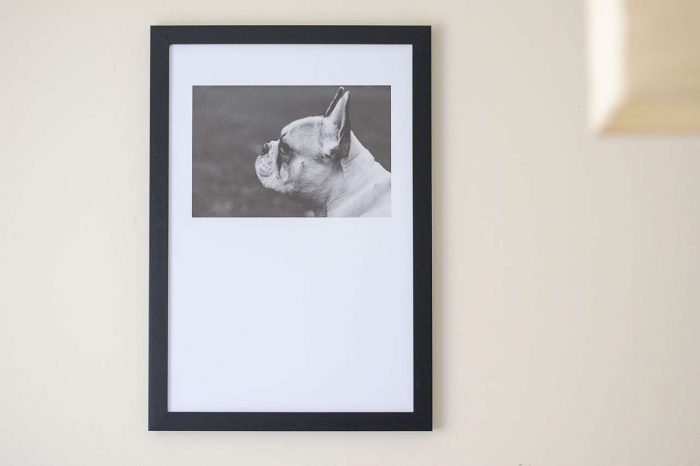
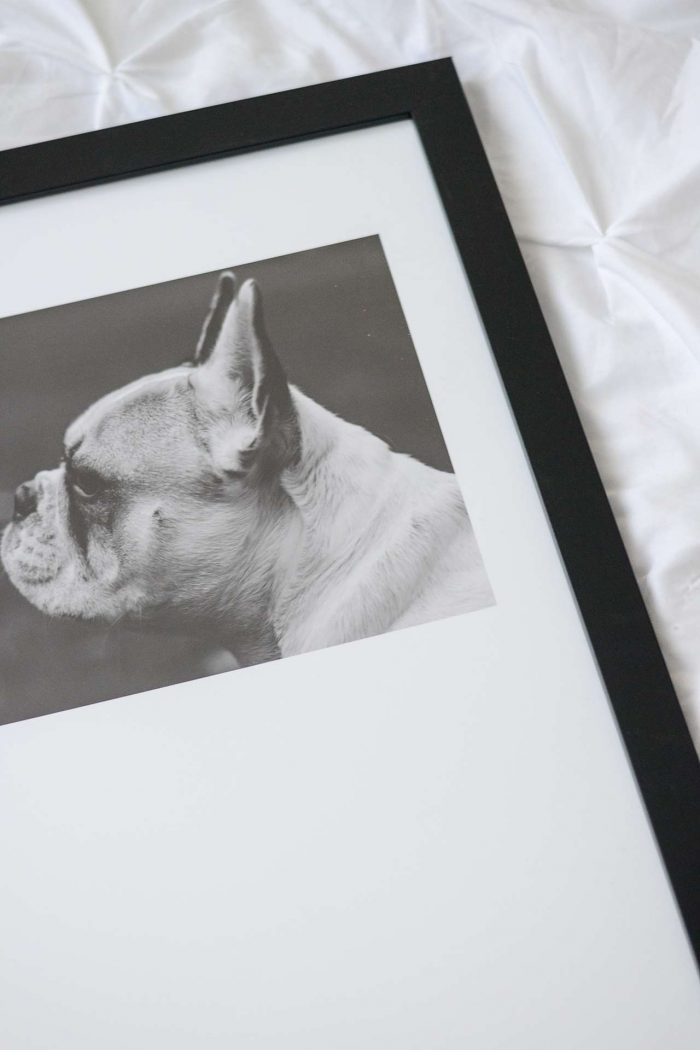
While here at Frame It Easy we offer true matting (i.e. a piece of acid-free matboard bevel-cut to surround your art) that is uniform on each side (1”, 2”, 2 ½”, etc.), if you’re looking for something like an offset mat — where all sides are not equal — you can achieve the look by adding in a “digital mat” before uploading your image to our site.
Time needed: 10 minutes.
Here’s how to create an offset “digital mat” in Canva:
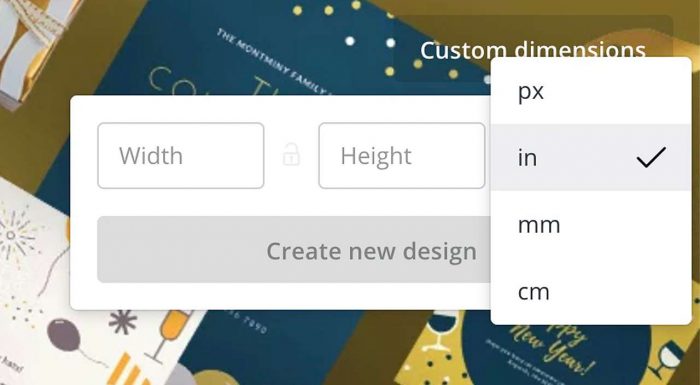
1. Click the “Custom Dimensions” Button
To do this in Canva, once you’ve created a free account simply go to “All Your Designs” on your account dashboard, and click the “Custom Dimensions” option in the top right-hand corner.

2. Change the Dimensions
Change the dimensions to inches (in), and enter the size you want your overall artwork to be. In this case we’re aiming for an “Art Size” of 16” x 24”, so that’s what we will enter.
3. Create New Design
Click “Create New Design” once you have your measurements entered.

4. Upload Your Photo
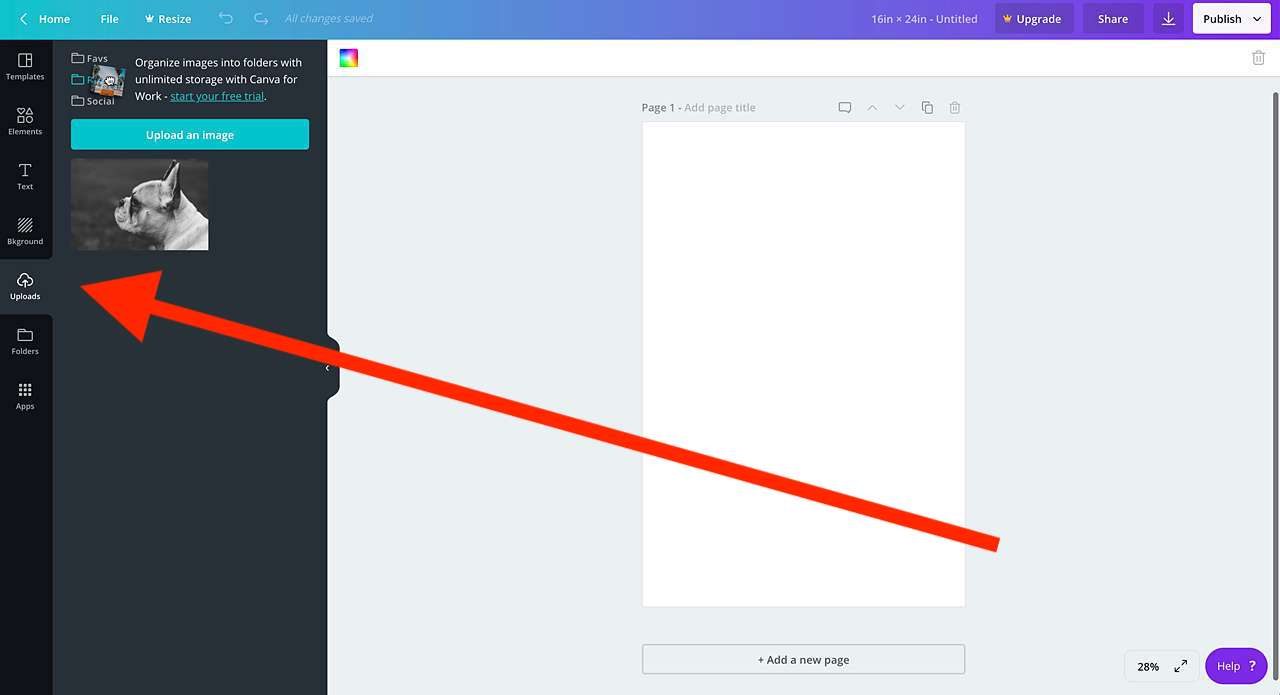
When it opens your new, blank document, navigate to the “Uploads” tab on the left-hand side. This is where you can drag and drop the photo(s) you wish to use. Again, upload the highest resolution possible! Once you have the photo uploaded, you can then drag it onto your blank canvas.
5. Position and Resize Your Photo
Here is where you can adjust the size of your image in relation to your digital “matting” — consider your blank background to be the mat. This is your chance to resize/crop your photo to fit the aesthetic you prefer.

6. Export as “PDF Print”
Once you have your image looking the way you want, click the arrow icon in the top right corner to choose your export options. To get your image at 300 DPI, you’ll need to download as a “PDF print,” then click “Download.”

7. Convert the PDF to JPEG or PNG
Once the file is saved to your computer, we now have to convert the PDF to a high resolution (“hi-res”) .jpeg or .png. (Canva’s JPG and PNG options only export at 96 DPI, which is a bit small for photo printing unless you plan for a much smaller frame.)
If you have an Apple/Mac, simply open the PDF in Preview, then go to “File” > “Export…” and choose your options — either a JPEG or a PNG, and change the Resolution to 300 pixels/inch.
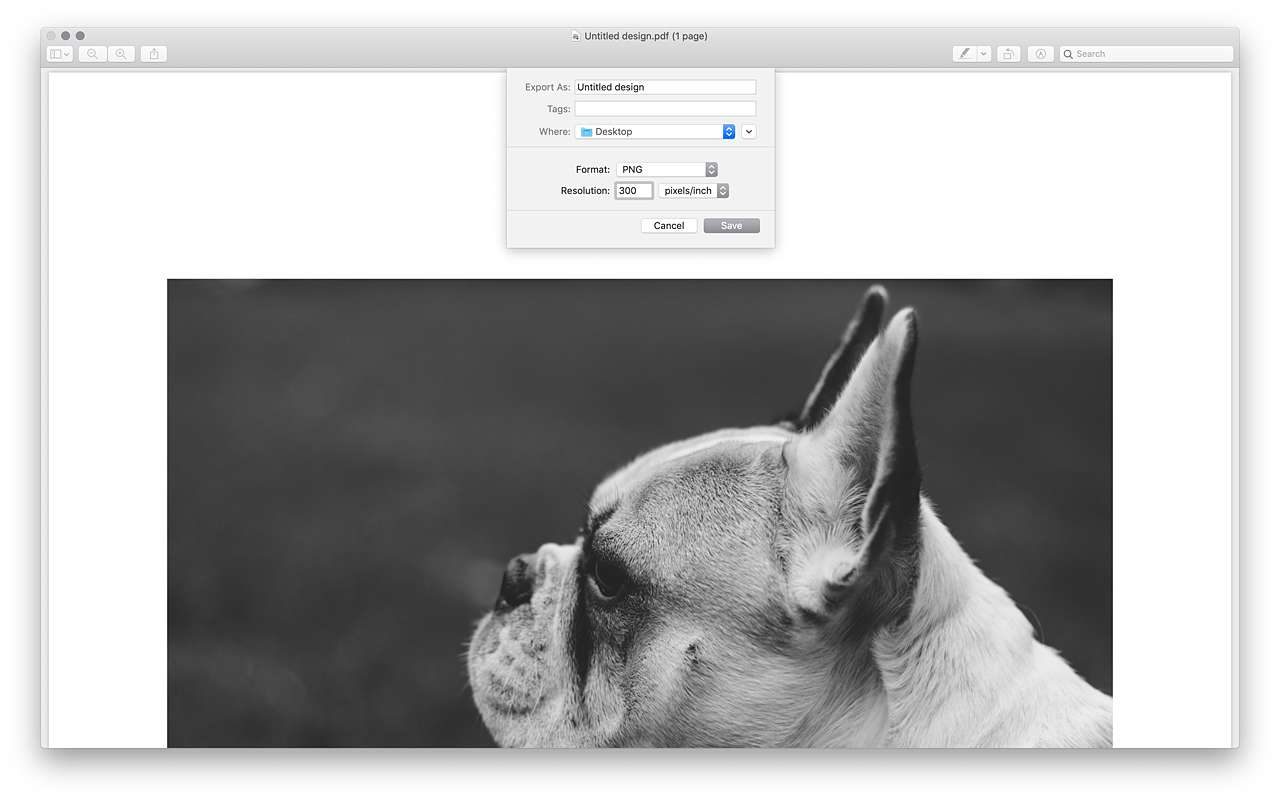
If you have a PC, you will need a third party PDF reader that will allow you to export as a hi-res JPEG or PNG, such as Wide Angle PDF Converter or Adobe Acrobat Pro.
8. Upload JPEG/PNG to Frame It Easy
Once converted, your file is ready to be uploaded for framing! (As mentioned earlier, you may have to slightly adjust the sizing, but it should be close to the original dimensions you entered in Canva. In this case we wanted 16” x 24”, but the default Art Size is 16” x 23 15/16” when uploaded. We can leave as-is, or manually adjust the height back to 24” with the dropdown.)
How to Format a Picture Frame Collage in Canva
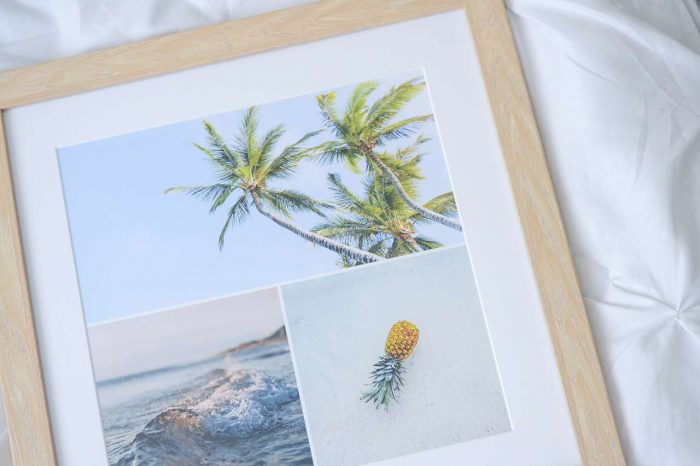
Similar to above, if you want to frame a collage of photos, you can do so by adding all of the imagery to one file you can then upload to our site.
1. Once you’ve created/logged into your free Canva account, go to “All Your Designs” on your account dashboard, and click the “Custom Dimensions” option in the top right-hand corner.

2. Change the dimensions to inches (in), and enter the size you want your overall artwork to be. In this case we will use 12” x 12”.

3. Click the “Elements” tab on the left-hand side, then click “All” above the “Grids” section. This will bring up a bunch of different collage/photo grid templates, so choose whichever you like best.
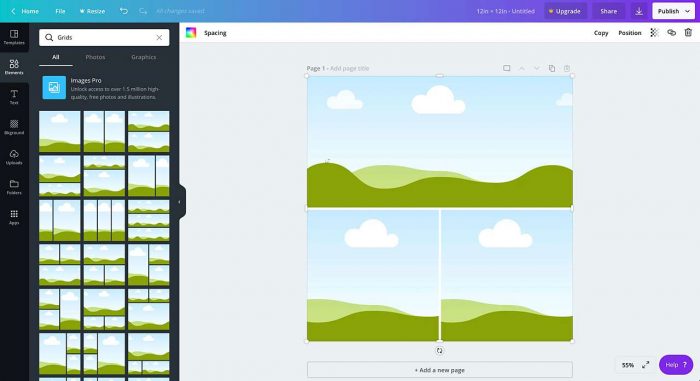
4. Once you have the grid you like selected so it pops into your canvas, click on “Uploads” on the left side to bring up your photo library. Drag and drop the photos you want to use over your canvas to the spots you want them to be in. *You can double click individual photos to adjust inside each grid section.
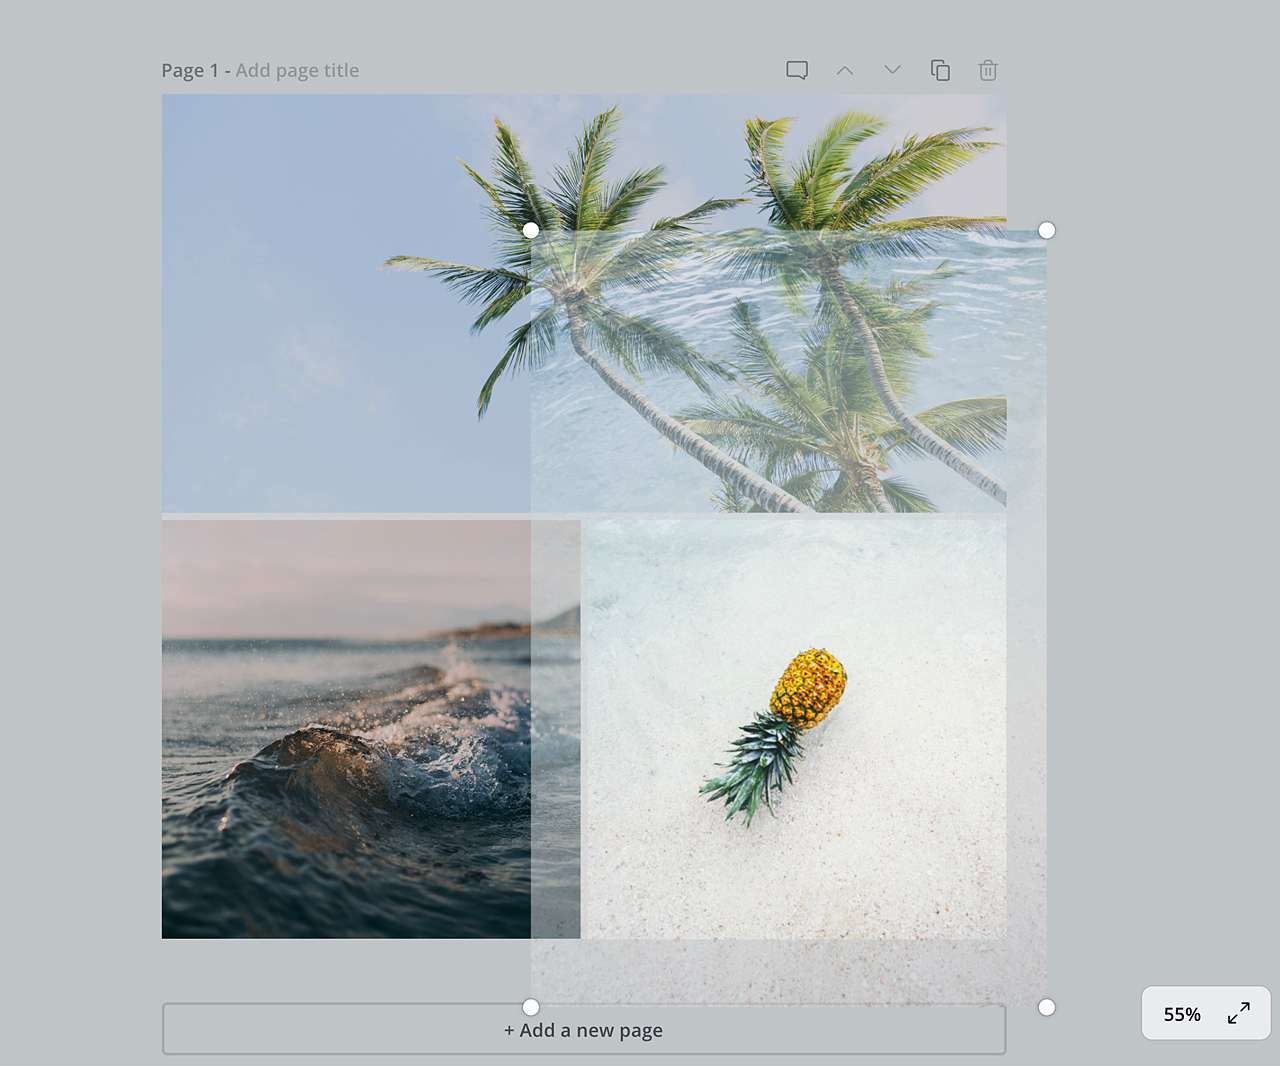

5. Once it’s looking the way you like, follow steps 6-8 above to export your file as a PDF, then convert to a JPEG or PNG before uploading for framing.
In this case, you can choose to add real matting for a uniform look, or combine this technique with how to create an offset digital mat for something truly unique!
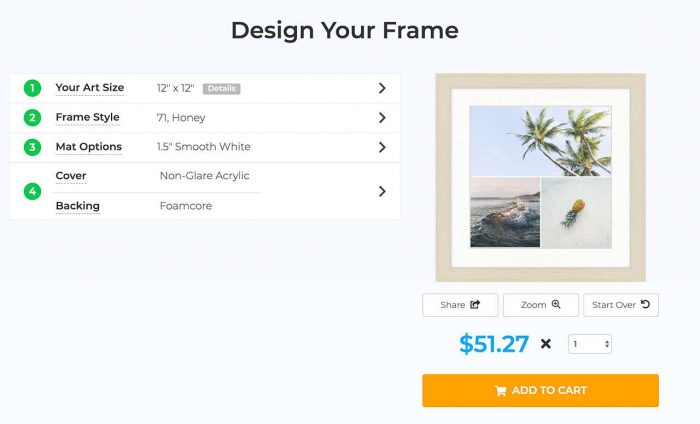
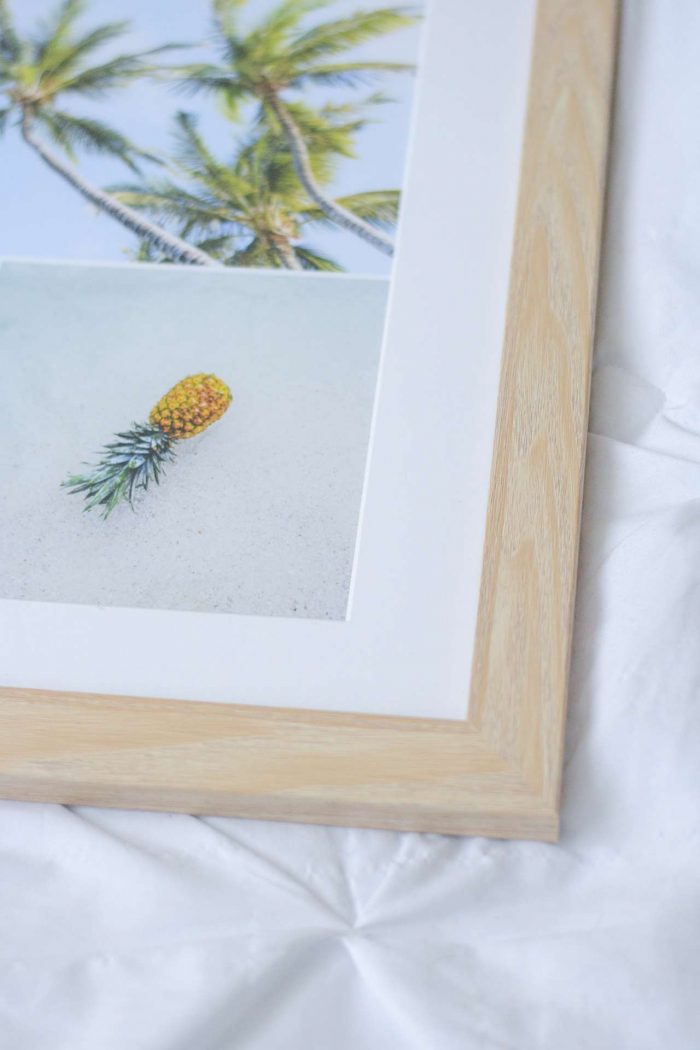
Interested? Check out more about Canva’s photo collages.
How to Format Photos in Photoshop
While Canva is an awesome tool for designing something quick and easy, if you really want to flex your photo formatting skills you’re going to want to use something more professional like Photoshop.
There is literally no end to the amount of precision and detail you can get into with Photoshop, so here we’ll just cover the basics of re-creating something similar to the above examples.
1. In Photoshop, create a new document in the size you prefer your art to be (in inches), and make sure the resolution is set to 300 pixels/inch. Since you can control the color mode here, you can choose CMYK* for a more accurate print representation, though any color profile will work for our own top-of-the-line printers here at Frame It Easy.
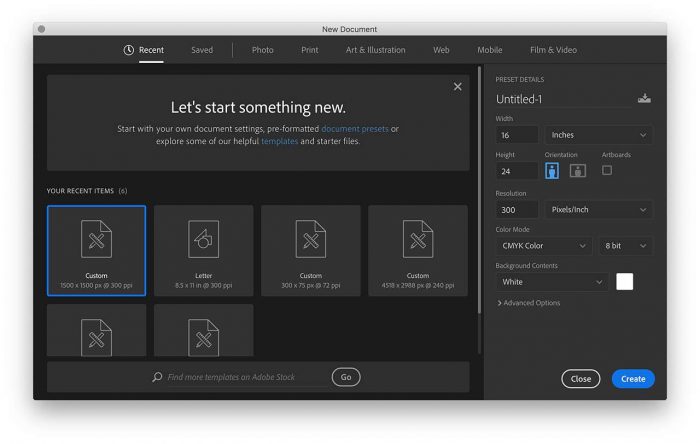
2. Once you have your blank canvas, import the photo(s) you want to use and arrange in a layout that you prefer — whether this is an offset “digital” mat or a collage.
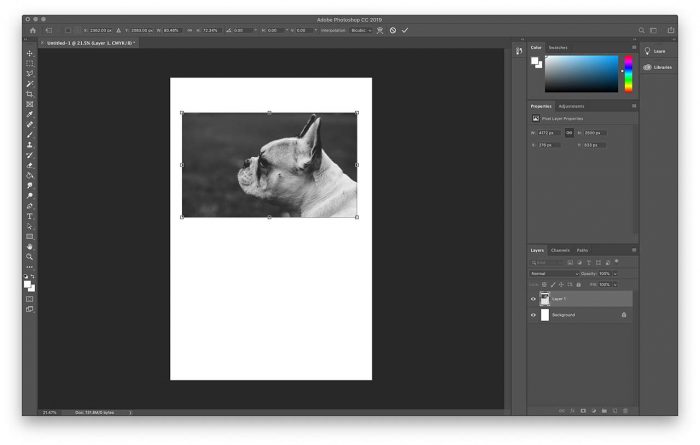
3. When you have your image looking the way you like, go to “File” > “Export As…” and choose either a PNG or JPG. Tick the box labeled “Embed Color Profile” under “Color Space”.
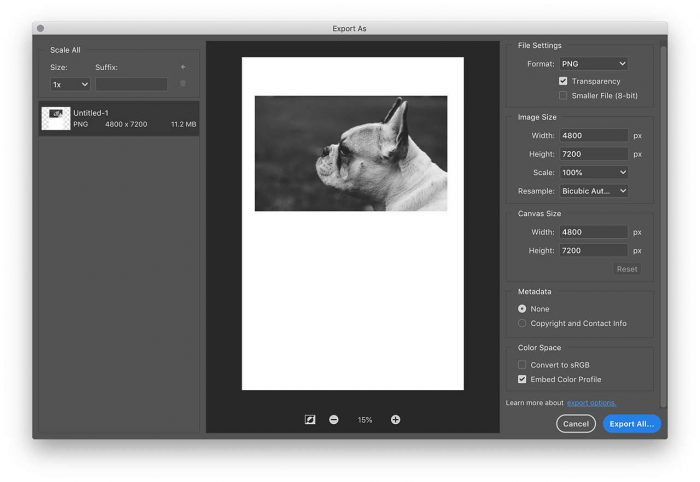
4. Now your file should be all set to upload for printing and framing.
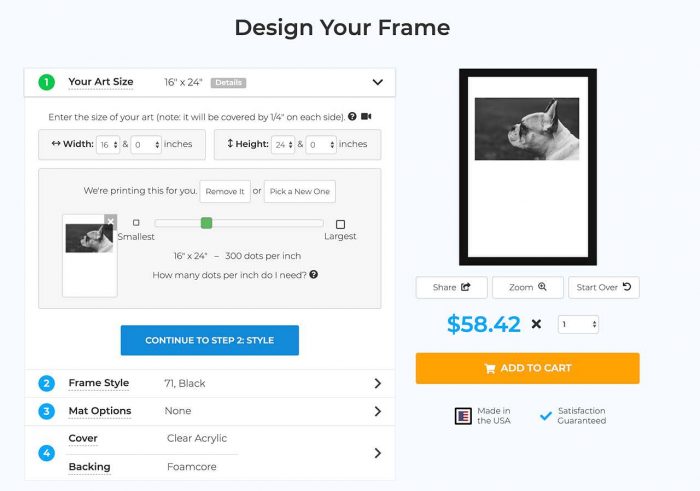
*A Quick Note About Color Modes & Print Quality

When it comes to color modes, typically RGB (Red, Green, Blue) is better for monitor display, while CMYK (Cyan, Magenta, Yellow, Black) is standard for print.
Although all colors can be achieved by merging red, green, and blue (RGB) light, monitors are capable of displaying only a limited range of the visible spectrum. So when you want to convert your web files to produce artwork for business cards or brochures, changing the format from RGB to CMYK is very important for those printed documents.
Most consumer level printers that accept RGB files automatically convert the images to CMYK which can result in faded, dull or inaccurate color representation, so converting your file to CMYK first gives you better control over the final image outcome. This is why professional printmakers and photographers save their work in CMYK for the most accurate and wide variety of colors.
Here at Frame It Easy we print from the exact file you give us, so you can expect a highly accurate result. Our printer can still render RGB files, as we use ten ink nozzles and a print output of over 2000 DPI (so you don’t have to worry about which color profile your image is).
Our print lab uses top-of-the-line large format printers and we print using archival-grade ink on premium semi-matte paper. We print at up to 2880 x 1440 DPI and stay as true to your uploaded file as possible, which is why it’s important you take into consideration size, formatting, and style before uploading your file(s) to us.
We never resample or perform destructive edits to your image, and we maintain the exact profile and colorspace embedded within your file — we never remove it or add our own.
The only thing we can’t do is calibrate our print output to what you see on your display – which means if you’re looking for extremely precise color matching on your print output, you’ll want to work with a specialized color lab, but that being said, we have never heard a complaint regarding color accuracy from our many corporate clients.
Final Thoughts
While there may be some technical limitations with your favorite frame shop, the art you frame is really only limited by your imagination. Hopefully, the examples above have armed you with enough inspiration to experiment with your own designs!
No matter what digital photo/art piece you choose to frame and mat online, our biggest piece of advice is to be sure you’re working with the highest resolution image possible — this will ensure a crisp and clear print that will truly shine within your frame.
As always, if you have any questions regarding online framing and matting, please don’t hesitate to reach out to our support team.
