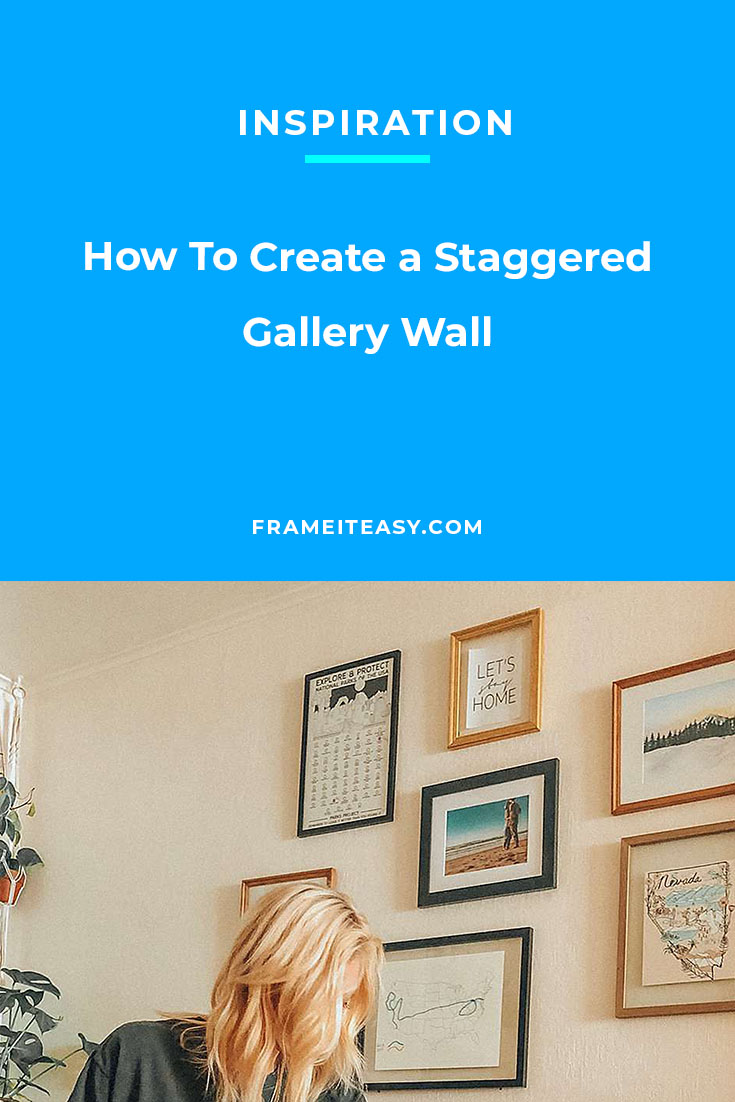
How to create a staggered gallery wall: When it comes to gallery walls, there are tons of different themes, styles, and layouts that you can try. If you’ve been here before, you know that we are big fans of gallery walls. Gallery walls are perfect for home decor for a variety of reasons. For starters, they truly allow you to personalize your home with your photos or art, which is a great way to make a new house feel like home.
Also, gallery walls make an awesome centerpiece, while also giving a room a sense of completion and cohesiveness. Rather than having to narrow down your favorite art or photos to just one or two statement pieces, you have the freedom and flexibility to arrange a bunch of different pieces. While of course, you create a grid-style or asymmetrical gallery wall, another layout we love is a staggering gallery wall.
How to Create a Staggered Gallery Wall in 5 Easy Steps
- Step 1: Find Your Wall
- Step 2: Choose A Theme
- Step 3: Plan Your Wall
- Step 4: Design & Order Your Frames
- Step 5: Hang Your Frames
Step 1: Find Your Wall

This may seem explanatory, but we figured we would still go over it. The first step is to find the perfect wall in your home. If you want to create a gallery wall in your living room, find a wall that has nothing else on it and no obstruction of views.
Of course, we have our non-glare acrylic cover if there is light hitting your wall, so you won’t need to worry too much about that. You can choose the wall behind your bed to create a beautiful gallery wall of your family photos, or even a wall in your kitchen to display your favorite travel places. Whatever works for you!
Step 2: Choose A Theme

Feel free to use any combination of photos and art to create your gallery wall. After all, it’s yours! But it’s become a popular trend to find a theme for your staggered gallery wall and to carry it out throughout your display. You can choose travel photos, family photos, art and design, or anything else that means a lot to you.
Do you have a collection of maps from your favorite places you’ve visited or lived? Frame those! Are you a big puzzle fan? Frame the puzzles you worked so hard to complete. There are unlimited possibilities when it comes to framing, so choose something that is special to you!
Sign up for our weekly newsletter and receive
tips, inspiration, and discounts on our custom frames!
Step 3: Plan Your Wall

This may seem unusual to plan the wall before actually purchasing your frames, but it actually will help you out in the long run! We suggest using painters tape or brown paper to plan out your wall. This will help you to decide what frame sizes you will need to create the perfect staggered gallery wall.
Remember, because it is staggered, you will need different sized frames. Take a look at the photos you want to frame and write out which sizes will work for each.
Step 4: Design & Order Your Frames

Your next step is going to be to design your frame. Our Frame Designer has four easy steps.
1. Enter your art size.
If you are uploading your portrait, we will print, mount, and frame your photo so that your frame will arrive ready to be hung. If you are uploading your art to our site, you will also need to choose the type of paper you would like us to print on. As we mentioned, we offer both Photo Paper and Art Paper. If you already have a physical copy of your portrait, simply measure the photo and add in the art size on our site.
2. Choose your frame style.
We have 8 frame styles, 5 metal frames, and 3 wood frames with over 18 frame colors.
3. Matting or no matting?
A matboard (also referred to as a photo mat, frame mat, or matting), is a cardboard-like material that serves two purposes: to protect your artwork from damage and to enhance the look of it. You have the option to add a single or double matboard, or none at all.
We suggest if you are adding a matboard to add a color that is going to enhance your picture. Look for small colorful details in your photo, such as an accessory, an article of clothing, or even something in the background of your photo that will give your portrait that extra POP it was looking for!
4. Finally, your cover!
Last but certainly not least is choosing your cover. We have two options for covers, our clear acrylic which is most conventional and almost like looking through glass. If your art is colorful, clear would be the best option, as it would not soften any of the colors in your photo or artwork. However, the clear finish is reflective, and it could cause glare if placed near a window, where the sun would shine through.
The other option is our non-glare acrylic. This will soften the color of your artwork, so we recommend using it if your overall piece doesn’t have bright colors, or is entirely in black and white. Non-glare acrylic will also diffuse sunlight that hits it, which would make your artwork more viewable if it’s near a window.
Step 5: Hang Your Frames

Once your frames arrive at your doorstep, it’s time to start the hanging process! Our packaging is custom-made to each frame, so you won’t receive any bulky packaging with tons of bubble wrap. Your frame will also be shipped with all the necessary hanging hardware, so you won’t need to worry about purchasing that.
Once you are ready to start hanging, look back at the staggered gallery wall you have planned before purchasing your frames. This will make hanging your frames a breeze! If you need any extra help with hanging your frames, we’ve got you covered. Take a look at our post on how to hang a picture like a pro.
Once you have finished hanging your frames, take a step back and admire all your hard work!
🎬 How To Create A Staggered Gallery Wall: Final Thoughts

Hanging a staggered gallery wall can be seen as a daunting task, but don’t let that fear stop you from creating something beautiful in your home. If you’ve learned how to create a staggered gallery wall with our frames, be sure to share your photos with us on social media, we can’t wait to see!