You may have noticed a new art trend lighting up your TikTok or IG feed. Artworks featuring beautiful swirls and blobs of color cascading over a canvas or cloth seem to be the hot topic as of late – and we can’t blame the hype, these works are mesmerizing to look at!
You May Have Asked…
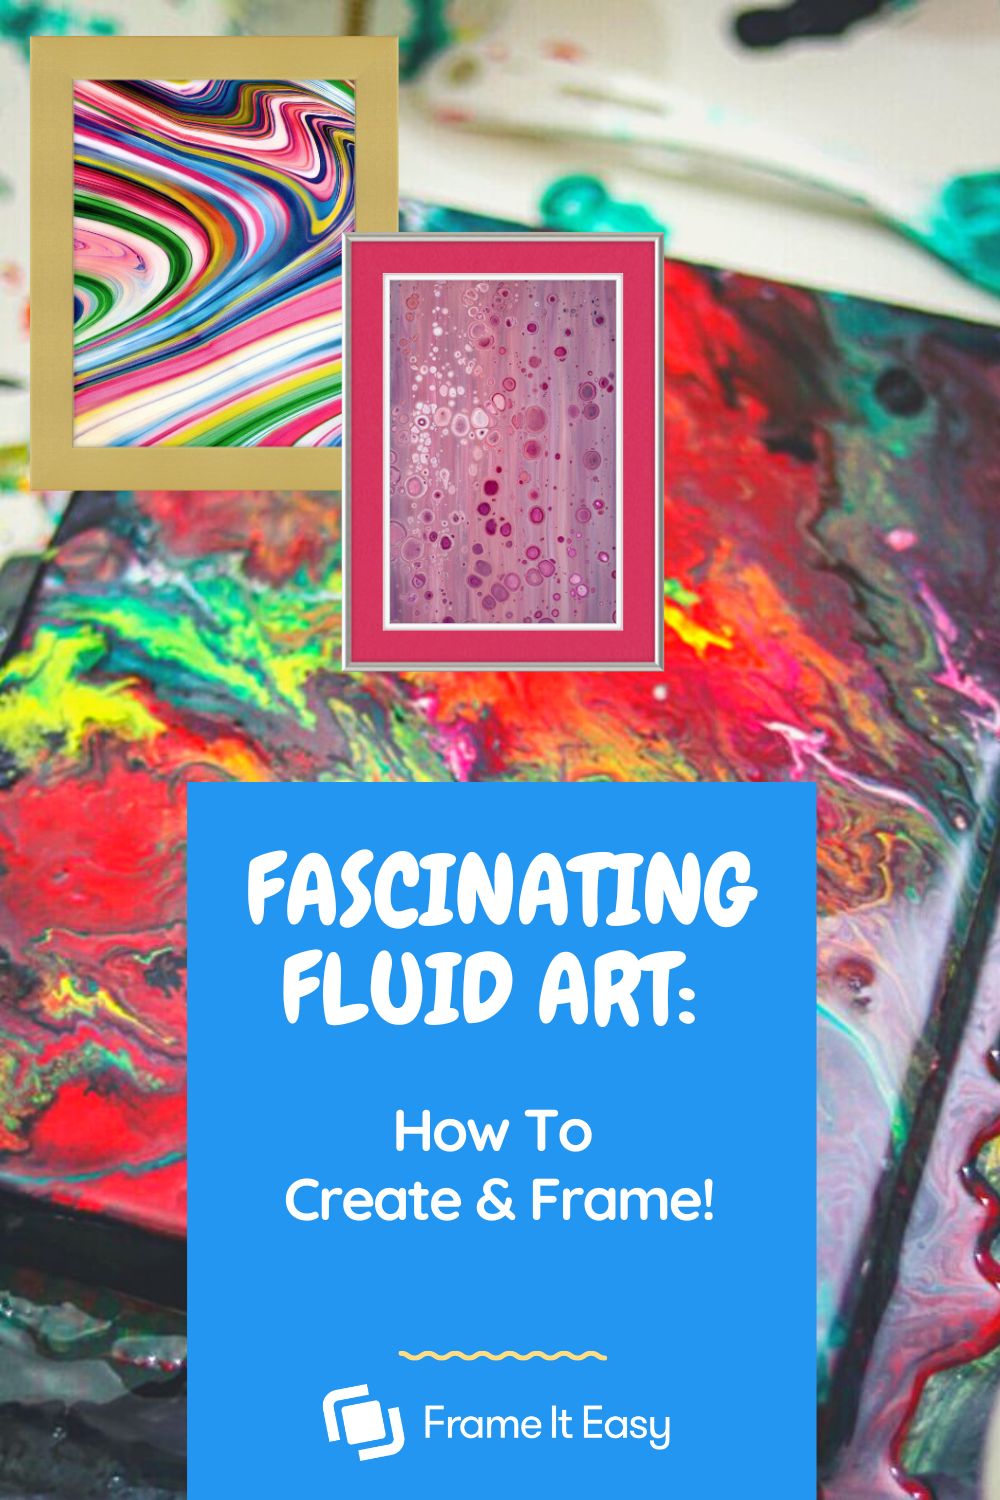
- What is fluid art or pour art?
- How can I make my own fluid art painting?
- How do I frame fluid art, pour art, or my own pour painting?
Join us as we dive into this captivating art form and explore what fluid art is, how to make your own, learn some tips and tricks of the trade – and of course how to frame and display your own pour art!
What Is Fluid Art?
Fluid art, pour art, flow art, and also called paint pouring art, is a painting style that involves the pouring, dripping, splattering, or even dumping of different color paints or resins onto a canvas. This art form relies on gravity and allows the colors to blend, swirl, and interact with each other. Thus creating interesting patterns and designs covering the entire canvas.
How To Create & Frame Your Own
Intrigued, right? 🤔 If you’re thinking of trying it yourself we’ll guide you through all the steps of this fun creative process so you too can paint and frame your own fluid art masterpiece!
Materials
Before we dive right in, make sure you gather the following materials so you can get your flow (painting) on! (See what we did there 🤭)
- 🎨 Paints – Acrylic paints and resins are most commonly used for fluid art as they are thick enough that they won’t bleed into other colors – to avoid creating a gray gloppy mess! Think about your color palette and select colors that will complement each other. 🌈
- 📋 Canvas – A stretched canvas, thick paper, or even fabric like denim will work very well for fluid pour art, there’s a lot of paint layering for this art form, so make sure when choosing your canvas that it’s thick!
- 🪣 Containers – This is a super important part of the puzzle! Depending on your canvas size, grab buckets, cups, or other large containers to mix and pour your paints or resin.
- 🧪 Paint Thinning Medium – To get a smooth, silky pour you may need to thin down your paints a tad. There are several different pouring mediums to try, but, we recommend this one.
- 🪢 String – One of the pouring techniques we’ll go over involves using a rope or string to pendulum your paint container back and forth to create interesting patterns – this one is optional!
- 🖌️ Brushes – Use brushes or wooden stirring sticks to mix up your paints and thinning mediums to get your ideal blend.
- 🧹 Mop – Hey! We didn’t say this was a clean project! You may need a mop and bucket for this if you’re doing this in a garage or studio space.
- 🧤 Gloves – It’s gonna get a bit messy so we recommend gloves, an apron, and maybe some protective eye gear if you plan to get wild.
- 🖼️ Frame – Ah…yes, of course, the finishing touch! You’re for sure going to need one of these bad boys! Luckily, you’re in the right place!
Pour Art Techniques
Now that you’ve gathered your materials, it’s time to figure out which style of pour or what technique you would like to use to pour! We’ve listed a few of the most popular techniques you can use and explore. Each one will create a different effect and pattern in your fluid art. So try a few out and find your flow!

Clean Pour
For this technique, each individual color is poured separately onto the canvas. This allows the paints to flow and mix naturally. This also lets the artist pick and chose where they want to drop in color on the canvas.
Dirty Pour
This pour involves mixing multiple colors into a single cup or container before pouring them into the canvas. As you pour the contents out, the colors will mix and create a marbled effect. Artists will also pick up, twist, and turn the canvas to stretch the marble effect over the entirety.
Dutch Pour
A Dutch pour is when colors are layered in a cup and then slowly poured over the canvas. (This is done very carefully so the colors won’t mix in the container!) As the paint spreads out, it creates cell-like or bubble-like formations due to the slow pouring method.
Swirl Technique
This technique can be done in two different ways. The first is where the artist will pour multiple colors onto the center of the canvas and then use a tool like a paintbrush or a palette knife to create swirls by dragging the paint across the canvas surface gently.
The second way to achieve this is by pouring over the canvas starting at the center, then moving outward in a spiral motion. Many artists will also pick up the canvas and rotate it in a circular motion to help the paint flow.
Swipe Technique
This technique is very similar to the Swirl Technique we mentioned above. Multiple colors are poured onto the canvas. Then with a tool, like a damp cloth or rubber spatula, the paint is gently dragged across the surface in a swiping motion.
How To Frame & Display
Once you’ve completed your awesome new pour art be sure to let it dry and cure for at least 48 hours! It may even take up to 3-4 full days depending on the thickness of paint and how many layers that were poured.
After your painting is completely dry it’s time to move on to framing! Not only will a frame make your piece look even better, but it will protect all your hard work and efforts from the elements and any potential chipping or fading.


Choose Your Frame Style
We recommend letting your pour art do all the talking for this display – so chose a thin frame like our Ashford or Hanover styles. If you want something a little bigger opt for the Bradford or Stafford style in a Matte Black or Satin Silver to keep the bright colors of your fluid art the main focus.
Matting
If you choose to add a matboard or two into your frame, choose complementary colors or a crisp white to add some brightness to the final framing piece!
Mounting
If you need a little extra staying power than just popping your painting into a frame, we recommend using the T-Hinge or H-Mount method!
Cover/Glazing Type
If you choose to add a protective cover we highly suggest using our clear acrylic option – it’ll really make those bright colors pop! If you’d rather skip this option and have an option frame, follow the video below on how to order a frame without a cover (It’s super easy!)
Hanging & Displaying
When it comes to displaying your new artwork, always use the hanging hardware that comes with your Frame It Easy frame. It’s super easy to put together and it’s made just for your frames, so you know you’re getting a secure fit!
The beautiful thing about abstract works like fluid art is that they can pretty much fit in anywhere in a space. Whether you hang your new piece in the kitchen, office, or bedroom, the choice is all yours.
Final Thoughts
We hope this post has shown you how exciting and versatile fluid art can be as not only a beautiful art form but as an individual artistic expression! With enough practice, the right materials, and some quality framing (we’ve got your back there!👍) – you too can create your own awesome works of pour art! Whether you choose to hang it at home, in an office space, or give it as a gift, your work will be sure to impress!

Show off your framed fluid art, photos, and more! – Inspire others by sharing your photos, and tell us your story! If we share it, you’ll receive a coupon for 15% off your next order!
Don’t forget to follow us on our socials for more daily inspiration and check out our Shopify app to start selling your own framed prints!