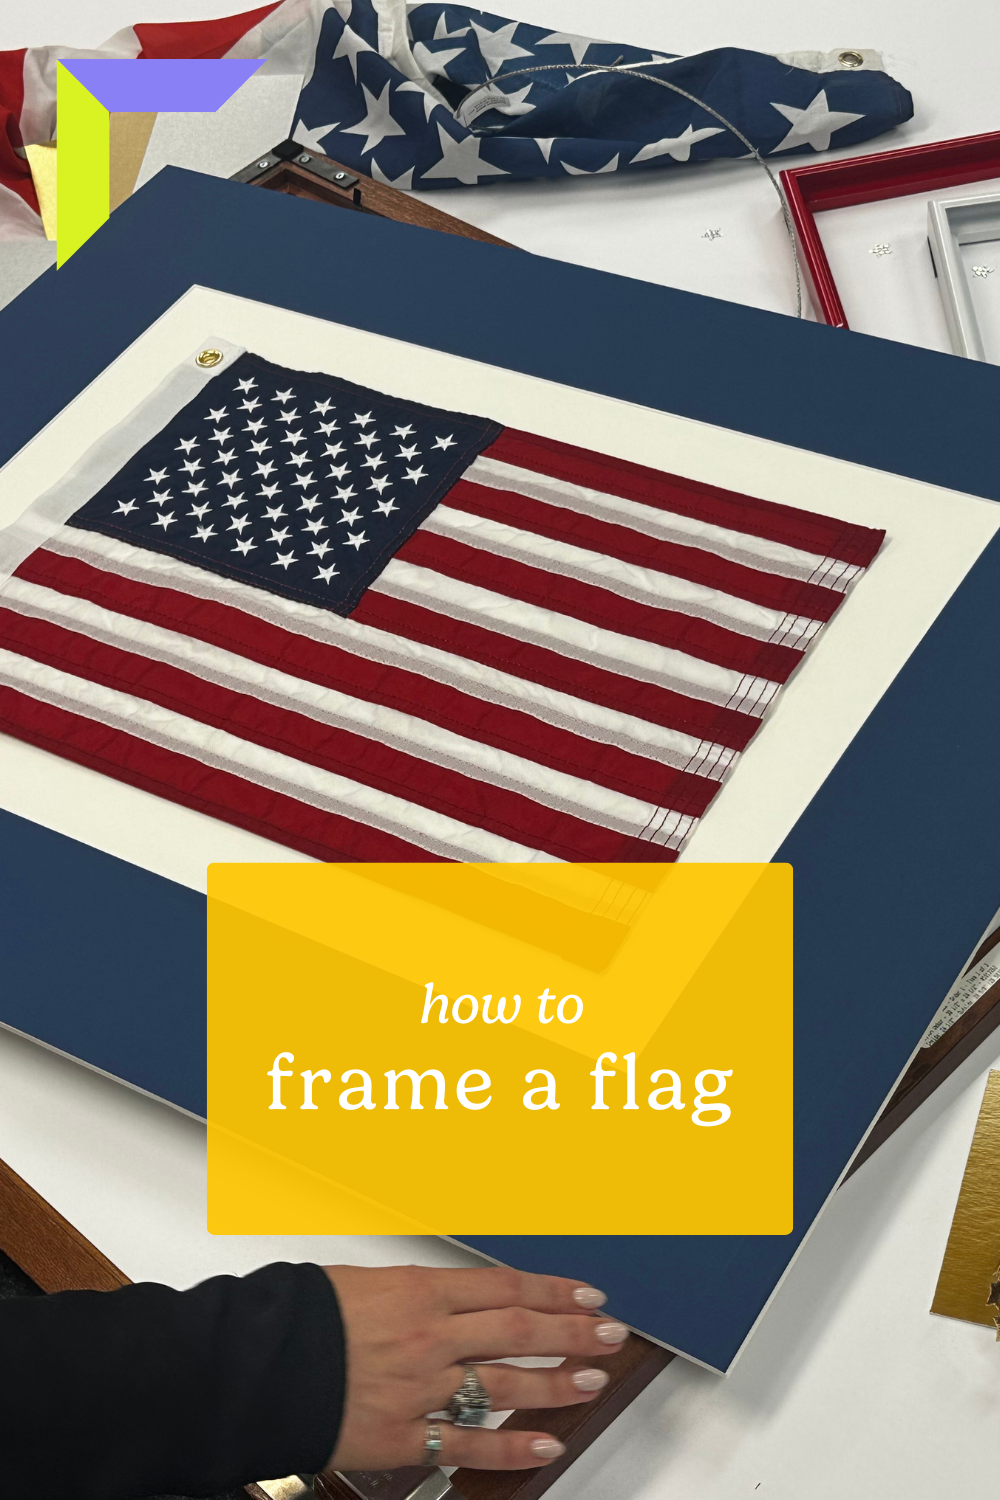
If you’ve been searching for tips on how to frame a flag, our DIY-friendly process makes it simple to preserve and showcase your flag beautifully. Framing a flag is a fun, easy way to create a patriotic statement piece that celebrates history, heritage, or personal milestones. Maybe you have a military service flag you’d like to preserve, a treasured sports banner, or a vintage find from your travels. Our custom framing makes it simple to get the perfect fit, right from home. With our made-in-the-USA frames and step-by-step process, you can turn your flag into a display-worthy piece of art that’s ready to hang and enjoy.

Materials You’ll Need
- A flag of your size choice
- Acid-free backing board
- picture frame
- Mat board
- UV-protective acrylic
- Archival adhesive stickies
Tips and Ticks Before You Start
Prep the Flag
Before you start framing your flag, depending on the material, you may want to gently steam it to remove wrinkles. Handle carefully, especially if it’s antique or delicate. As always, be sure to work on a clean surface.
Measure the Flag
Once you have chosen your preferred flag, be sure to measure the dimensions and choose a frame size accordingly. Measure the full width and height when laid flat. If the flag has uneven edges or curls, measure the maximum dimensions. Decide how much space you’d like around the flag as breathing room. You can go anywhere as small as 1/2″ on each side, but we don’t recommend anything smaller than that.
If your flag is 1 x 1.5 ft like ours, your order may look like this:
With no additional matting:
- Art Size: 22 1⁄2” x 16 1⁄2“
- Outside Frame Size: 23 5⁄8” x 17 5⁄8“
- Frame Style: Danbury, in Whitewash
- Cover: Clear Acrylic
- Backing: Acid Free Foamcore
With no additional matting:
- Art Size: 22 1⁄2” x 16 1⁄2“
- Outside Frame Size: 32 5⁄8” x 26 5⁄8“
- Frame Style: Dayton, in Umber
- Matting: 4″ Bottle Blue
- Cover: Clear Acrylic
- Backing: Acid Free Foamcore

Design the Frame Based On Flag Size
Choose a frame that can support thicker art. Deeper frame styles are best for this. Flags have texture and can’t be flattened quite like paper. At Frame It Easy, we can frame pieces from a small 5″x5″ section to a bold, statement-making 42″x62″ display, perfect for showcasing your flag with pride.
Here’s how it works:
Metal Frames: Great for larger displays, our metal frames can hold materials up to 1/4″ thick — plenty of room for most folded or flat flags (including any matting you choose). With a single mat, your flag should be no more than 3/16″ thick, and with a double mat, no more than 1/8″ thick. Spring clips keep your flag secure so it stays perfectly in place.
Wood Frames: For a timeless, classic look, our wood frames can hold up to 1/8″ thick with no mats or a single mat, and up to 1/16″ thick if double matted — perfect for a neat, flat flag display.


Next, decide on matting. We recommend only a single mat. Plenty is going on in the frame already! Essentially, this is considered a “float mount,” so you can decide on no matting, or a single neutral colored mat so your flag remains the star of the show.
Pick your cover. We have 3 options, but so suggest our UV conservation clear acrylic, as it is safest for textiles, valuables, and sentimental items.
Use acid-free foamcore board or matting as the base to mount your flag.
How To Mount The Flag
First, place your flag in the center of your board to get a general idea of placement. Feel free to eyeball this if you’re feeling confident! Now flip it so we can start mounting.
To mount the flag using a fully reversible, no-damage method, we’re using acid-free adhesive. This will hold the fabric in place. If your flag is larger or needs extra support, you can add additional pieces along the edges. Be sure the flag is secure.


Then flip that Old Glory over once more and place the flag carefully in the center of your board. Arrange it exactly how you want it to appear in the frame.
Frame It Flaggy
Now that your flag is mounted to the foam core, you can assemble your frame parts. If you chose to have matting, place your matting on top, but underneath the cover. Be sure to give everything a quick dust to remove any unwanted dander. You’ll want to do the same to your acrylic cover. Place all the components into your frame, and secure the backing tabs. Lastly, secure the hanging wire to the D-ring as the final frame assembly step!


Final Touches
Once your flag is secure, give the frame a quick dust so it shines. Then, hang it proudly on your wall or style it leaning on a shelf for a more relaxed look. Framing a flag is just as simple as framing art, and it instantly transforms your flag into meaningful wall decor. Ready to create your own? Design your custom frame today and enjoy a DIY wall art project you’ll be proud to show off.