Secure Hanging Hardware
While every frame at Frame It Easy ships equipped with proper hanging hardware, we also provide the option of purchasing secure hanging hardware for both our wood and metal frames. This is an alternate hanging system that securely fastens your frame to the wall — top and bottom — so it cannot be easily tilted or removed. This is great for larger frames, as well as frames that you never want to worry about moving out of place.
Benefits of Choosing Secure Hanging Hardware
- Prevent crooked frames (from cleaning, being bumped into, etc.)
- Prevent frames from getting knocked off a wall
- Prevent frames from being removed from a wall
- Prevent warping in high/variable humidity
- Secure a frame to uneven drywall
- Secure a frame into a cement or wood wall
Ideal places to use frames with secure hardware:
- High traffic areas
- Commercial buildings / offices
- Kid spaces
- Staircases
Also handy for:
- Panoramic photos
- Gallery walls / displays of many frames
- Large frames
- Creative uses (hang frames on ceiling, hang at a particular angle, etc.)
How to Install Your Secure Hanging Hardware
Tools needed:
- Drill
- Level
- Pencil
- Measuring tape
- Phillips screwdriver
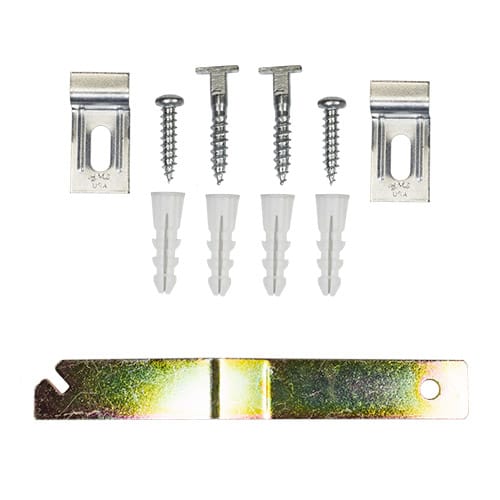
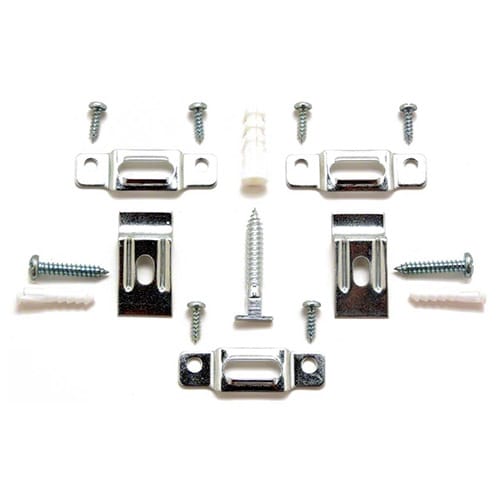
- Metal or Wood Frame Secure Hanging Hardware Kit — comes with:
- Mounting bracket screws and anchors
- Mounting plates (Wood frames only)
- T-screws and anchors
- Slotted t-wrench
Installation Instructions:
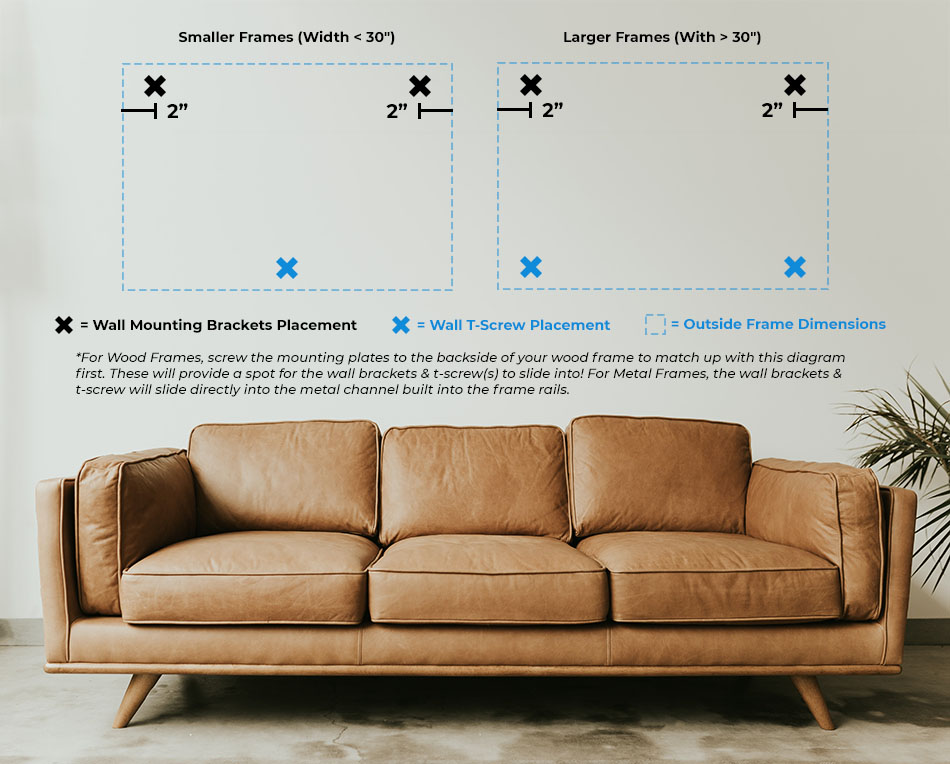
- Measure the outer dimensions of your frame and mark about 2" in from each side on your wall. This is to ensure proper placement when you go to mount the brackets to your wall.
- Attach top two wall brackets. Drill holes, add anchors, and secure the two brackets where you marked.
- Add bottom t-screw. Mark 1/4" up from the bottom-center of where the frame will rest, making sure the t-screw will end up inside the bottom frame rail. NOTE: For larger frames, it may be necessary to install two t-screws at similar spacing to the brackets.
- Hang frame. Place upper frame rail on brackets to hang.
*For Wood Frames, screw the mounting plates to the backside of your wood frame to match up with the diagram below first. These will provide a spot for the wall brackets & t-screw(s) to slide into! For Metal Frames, the wall brackets & t-screw will slide directly into the metal channel built into the frame rails. - Use slotted t-wrench to rotate t-screw a quarter-turn (90°). If measured and placed properly, the t-screw will lock into the bottom frame rail when rotated, securing it to the wall.
*For larger frames, you can use two t-screws spaced evenly on the bottom.
Note: Feel free to watch the video at the top of this page for visual reference!
Still need help?
Our customer support team is ready to help you with any clarification and additional instruction you need to get the perfect hang of your frames!
